
Sealing Concrete Driveway Cracks: 2026 Repair Guide
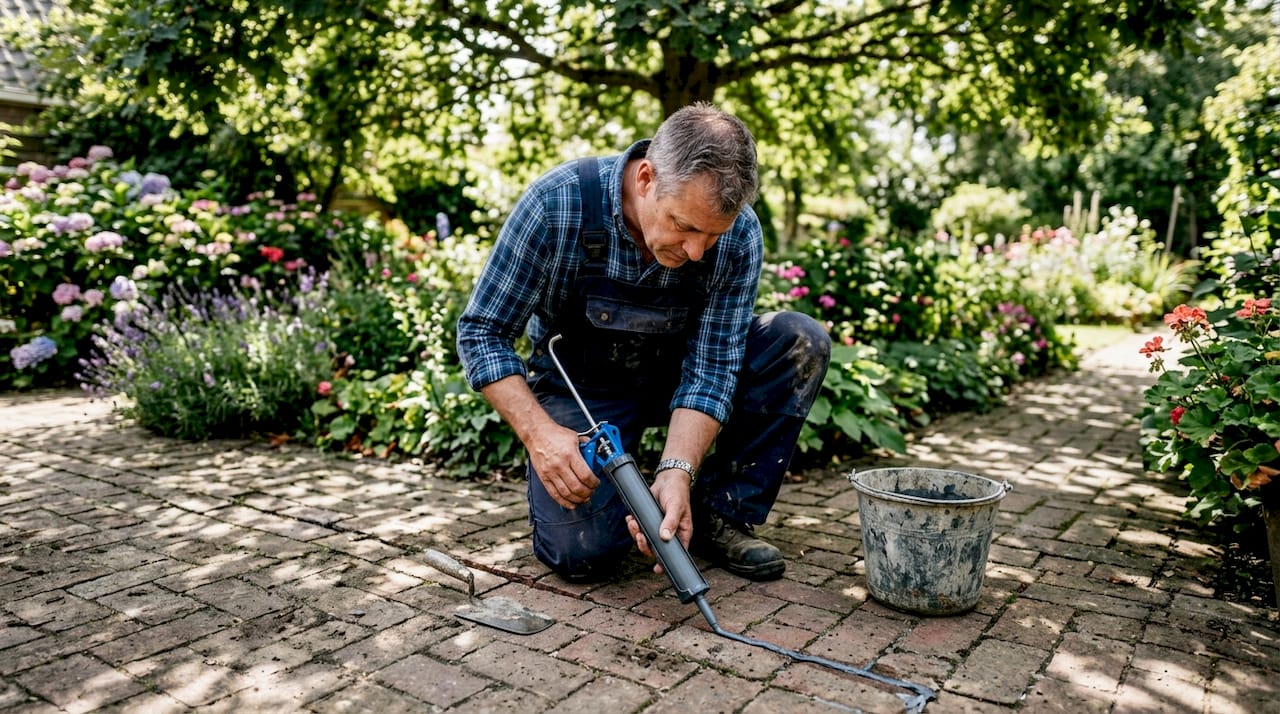
Sealing concrete driveway cracks is defined as filling and waterproofing fractures in a concrete slab to stop water infiltration, prevent freeze-thaw damage, and extend the surface’s usable life. Colorado homeowners face this problem every spring, when months of freeze-thaw cycles leave behind hairline fractures and wider splits that grow fast if ignored. The right repair combines proper crack identification, thorough preparation, and the correct sealant for the job. Alldaypowerwashing works with Colorado homeowners on driveway maintenance, and the single most common mistake they see is skipping prep and going straight to product. This guide covers every step, from crack type to cure time, so your repair lasts.
What are the common types of concrete driveway cracks?
Crack type determines everything. The sealant that works perfectly on a hairline fracture will fail completely on a wide, moving crack. Getting this right before you buy anything saves time and money.
Hairline cracks are surface-level fractures under 1/8 inch wide. They are cosmetic in most cases and do not threaten structural integrity. A thin, penetrating concrete sealer handles these well.
Narrow cracks run from 1/8 inch to 1/2 inch wide. These are the most common DIY repair target. Self-leveling polyurethane sealants handle this range well, and foam backer rods become useful at the wider end of this range.
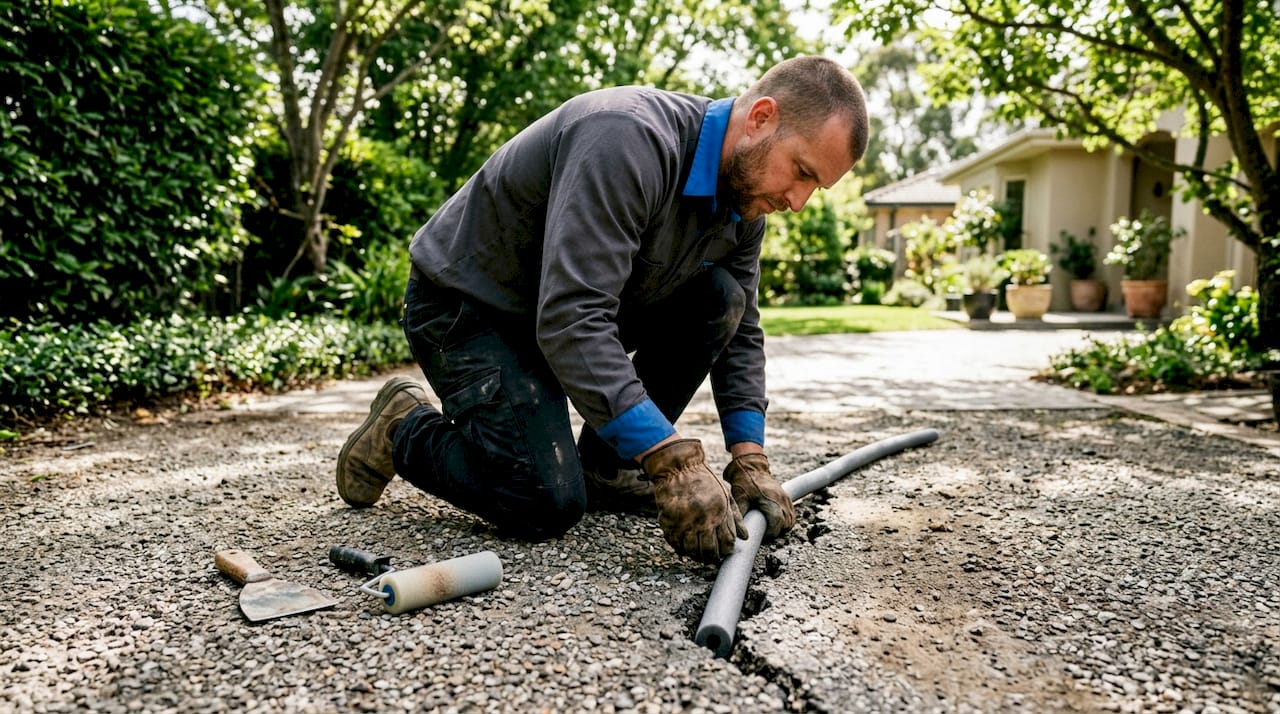
Wide cracks exceed 1/2 inch. These almost always need a backer rod plus a flexible sealant. Cracks wider than 1/2 inch with vertical displacement between the two sides should be evaluated by a professional before any DIY sealing attempt.
Beyond size, crack movement matters just as much:
- Dormant cracks are stable. They do not move with temperature changes. Rigid cementitious fillers work fine here.
- Working cracks expand and contract with heat and cold. Colorado’s wide temperature swings make working cracks common. These require a flexible, elastomeric sealant that stretches without breaking.
- Structural cracks show vertical displacement, meaning one side of the crack sits higher than the other. This signals a soil or drainage problem beneath the slab, not just a surface issue.
- Spreading cracks grow wider or longer over time. Sealing them without fixing the root cause is a cosmetic fix that fails within one season.
Identifying whether your crack is dormant or working is the single most important decision in the repair process. Get it wrong and even the best sealant fails.
How to prepare a concrete driveway crack for sealing
Proper surface preparation beats any expensive product. A clean, dry surface is the foundation of every durable crack repair. Skipping this step is the leading cause of sealant peeling and failure within the first year.
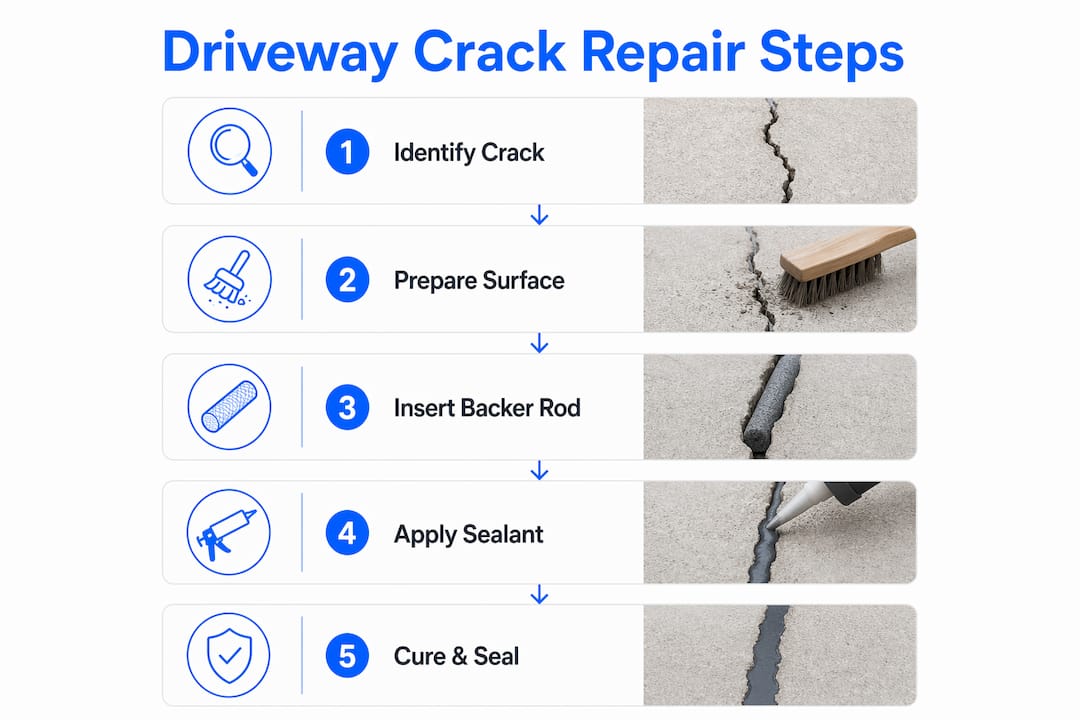
- Clear loose material. Use a cold chisel and hammer to chip away any crumbling or flaking concrete along the crack edges. Loose material prevents sealant from bonding to solid concrete.
- Scrub the crack. Work a stiff wire brush along the full length of the crack. This removes embedded dirt, old filler residue, and surface oxidation that block adhesion.
- Vacuum out debris. Use a shop vac or leaf blower to pull all dust and loose particles out of the crack. Even a thin layer of dust breaks the bond between sealant and concrete.
- Widen narrow cracks if needed. Cracks under 1/4 inch wide benefit from being widened slightly with a cold chisel or angle grinder. A slightly wider channel holds more sealant and creates a stronger mechanical bond.
- Let the crack dry completely. Wait at least 24–48 hours after pressure washing or rain before applying any sealant. Moisture trapped under sealant causes bubbling and peeling.
- Check for moisture. Tape a small piece of plastic sheeting over the crack for one hour. If condensation forms underneath, the concrete is still too wet to seal.
Pro Tip: In Colorado, schedule crack prep on a dry day with temperatures between 50°F and 90°F. Sealants applied below 40°F cure poorly and may not bond at all.
Safety during prep is straightforward. Wear safety glasses when chipping concrete, use gloves when handling sealants, and keep the work area ventilated if you are using solvent-based products.
What is the best sealant for concrete driveway cracks?
Sealant choice comes down to crack size, crack movement, and crack location. The ASTM C920 standard is the benchmark for elastomeric joint sealants used on concrete. In homeowner terms, ASTM C920-rated products are tested to stretch and compress without failing, which matters enormously for working cracks in Colorado’s climate.
Rigid vs. flexible sealants
Rigid cementitious fillers are cement-based patching compounds. They work well on dormant cracks that do not move. They are inexpensive and easy to apply, but they crack again quickly if used on a working crack. Treating moving cracks with rigid fillers leads to premature failure every time.
Flexible polyurethane sealants are the right choice for working cracks. They stretch and compress with temperature changes. Self-leveling versions (classified as Grade P under ASTM C920) flow into horizontal cracks without tooling. Gun-grade versions require a caulk gun and work on vertical or angled surfaces.
When to use a foam backer rod
Foam backer rods prevent three-sided adhesion failure in deep cracks. Three-sided adhesion means the sealant bonds to both walls and the bottom of the crack. That setup restricts the sealant’s ability to flex, and it tears apart under movement. A backer rod fills the bottom of the crack so sealant only bonds to the two sides, keeping it elastic and durable.
Use a backer rod for any crack deeper than 1/2 inch. Push it to about 1/4 to 1/2 inch below the surface before applying sealant.
| Crack type | Best sealant | Backer rod needed? |
|---|---|---|
| Hairline (under 1/8 inch) | Penetrating concrete sealer | No |
| Narrow dormant (1/8–1/2 inch) | Rigid cementitious filler | No |
| Narrow working (1/8–1/2 inch) | Flexible polyurethane, self-leveling | No |
| Wide working (over 1/2 inch) | Flexible polyurethane, self-leveling | Yes |
| Deep crack (over 1/2 inch deep) | Flexible polyurethane, gun-grade | Yes |
Pro Tip: Never use mortar or hydraulic cement on a working crack. Both are rigid and will crack again within one freeze-thaw cycle.
How do you apply sealant to driveway cracks step by step?
Correct application is what separates a repair that lasts five years from one that fails before winter. Follow these steps for a clean, durable result.
- Cut the nozzle to match crack width. Trim the sealant tube nozzle to match the width of the crack as closely as possible. A nozzle that is too wide creates overflow and waste.
- Insert the backer rod. For cracks over 1/2 inch deep, press the foam backer rod into the crack with a blunt tool. It should sit 1/4 to 1/2 inch below the surface.
- Apply sealant with steady pressure. Move the nozzle along the crack at a consistent pace. Uneven speed creates air pockets, which weaken the repair.
- Let self-leveling sealants flow naturally. Do not tool or smooth a self-leveling product. It finds its own level and bonds better without interference.
- Keep sealant slightly below the surface. Filling flush or above the surface creates a bump that catches water and peels under traffic. Aim for 1/8 inch below the surface.
- Allow full cure before traffic. Sealants cure in 24–48 hours before foot traffic and typically 72 hours before vehicle traffic. Check the product label for specifics.
Pro Tip: Do not seal cracks in freezing temperatures. Below 40°F, most polyurethane sealants will not cure properly and the repair will fail before spring.
Avoid applying sealant immediately after rain or pressure washing. Wait at least 24 hours after any moisture exposure to guarantee adhesion. In Colorado, afternoon thunderstorms in july and august can reset your prep timeline, so check the forecast before you start.
When should you call a professional for driveway crack repair?
DIY repair works well for small to moderate cracks on a level, stable slab. Knowing when the job exceeds DIY scope saves you from wasting money on repairs that will not hold.
Call a professional when you see any of these signs:
- Vertical displacement. One side of the crack sits higher than the other. This means the slab is moving unevenly, usually due to soil erosion or drainage problems underneath.
- Cracks wider than 1/2 inch. These often signal structural stress, not just surface aging.
- Spreading cracks. If a crack you repaired last season is now longer or wider, the underlying cause has not been addressed.
- Multiple intersecting cracks. A pattern of cracks across a large area suggests the slab is failing, not just weathering.
- Sinking sections. Any part of the driveway that has dropped below its original level needs professional evaluation before sealing.
After a successful crack repair, apply a full driveway surface sealer only after the crack filler has fully cured. Applying sealer before crack repair leads to failure because cracks expand beneath the sealer coat. A surface sealer applied every 2–3 years protects the entire slab from UV damage, oil stains, and water infiltration. Sealing driveway cracks before winter is especially important in Colorado, where freeze-thaw cycles drive water deep into any open fracture and accelerate damage fast.
For root causes like poor drainage or unstable soil, a professional guide to crack prevention covers what to address before the next repair cycle.
Key Takeaways
Sealing concrete driveway cracks correctly requires matching the sealant to the crack type, preparing the surface fully, and waiting for complete cure before traffic or surface sealing.
| Point | Details |
|---|---|
| Match sealant to crack movement | Use ASTM C920-rated flexible polyurethane for working cracks; rigid fillers only for dormant cracks. |
| Prep is the most critical step | Clean, chip, vacuum, and fully dry the crack before applying any product. |
| Use backer rods in deep cracks | Insert foam backer rod in cracks over 1/2 inch deep to prevent three-sided adhesion failure. |
| Cure before sealing the surface | Let crack filler cure 24–48 hours before applying a full driveway surface sealer. |
| Know when to call a pro | Vertical displacement, spreading cracks, or sinking slabs need professional evaluation, not DIY sealant. |
What I’ve learned after years of watching driveway repairs fail
The most common mistake I see is homeowners buying a product first and then figuring out what kind of crack they have. It should always be the other way around. Crack movement is the defining factor, and no amount of premium sealant fixes a moving crack if you chose a rigid product.
The second mistake is rushing prep. I have watched people spend $40 on a quality polyurethane sealant and then apply it over a dusty, damp crack on a cold afternoon. The repair peels within three months. A $15 sealant applied over a perfectly clean, dry surface in good weather will outlast that every time.
Backer rods are underused. Most homeowners skip them because they add one extra step. But for any crack deeper than 1/2 inch, skipping the backer rod means the sealant is fighting against itself every time the temperature swings. In Colorado, that is a fight it will lose.
The repairs I have seen hold up the longest share three things: the right flexible sealant, thorough prep, and patience on cure time. None of those things are expensive. They just require attention.
— Brandon
Alldaypowerwashing and your driveway maintenance in Colorado
A clean surface is the starting point for any crack repair that lasts. Dirt, oil, and biological growth embedded in concrete prevent sealant from bonding, no matter how good the product is.

Alldaypowerwashing provides professional driveway cleaning in Denver and Colorado Springs using commercial-grade pressure washing equipment. Their crews remove the embedded grime, oil stains, and surface contaminants that a garden hose cannot touch, giving you a clean, ready-to-seal surface. They are fully insured, offer same-week quotes, and back their work with a satisfaction guarantee. If your driveway needs a thorough clean before crack repair or a full surface seal, request a quote and get a same-week response.
FAQ
What is the best sealant for concrete driveway cracks?
Self-leveling polyurethane sealants rated to ASTM C920 are the best choice for most horizontal driveway cracks, especially working cracks that move with temperature changes. Rigid cementitious fillers work only on dormant, stable cracks.
How long should I wait after pressure washing before sealing cracks?
Wait at least 24–48 hours after pressure washing or rain before applying any sealant. Moisture trapped under sealant causes peeling and repair failure.
Do I need a foam backer rod for every crack?
Foam backer rods are needed for cracks deeper than 1/2 inch. They prevent three-sided adhesion failure and keep the sealant flexible so it can move with the concrete.
Can I apply driveway sealer right after filling cracks?
No. Apply a full surface sealer only after crack filler has fully cured, typically 24–48 hours. Sealing over uncured filler traps moisture and causes both products to fail.
When should a cracked driveway be evaluated by a professional?
Cracks wider than 1/2 inch, cracks with vertical displacement between sides, or any sinking sections of the slab need professional evaluation before sealing. These signs point to soil or drainage problems that DIY sealant cannot fix.