
Epoxy Flake Floors: Your Complete Homeowner’s Guide
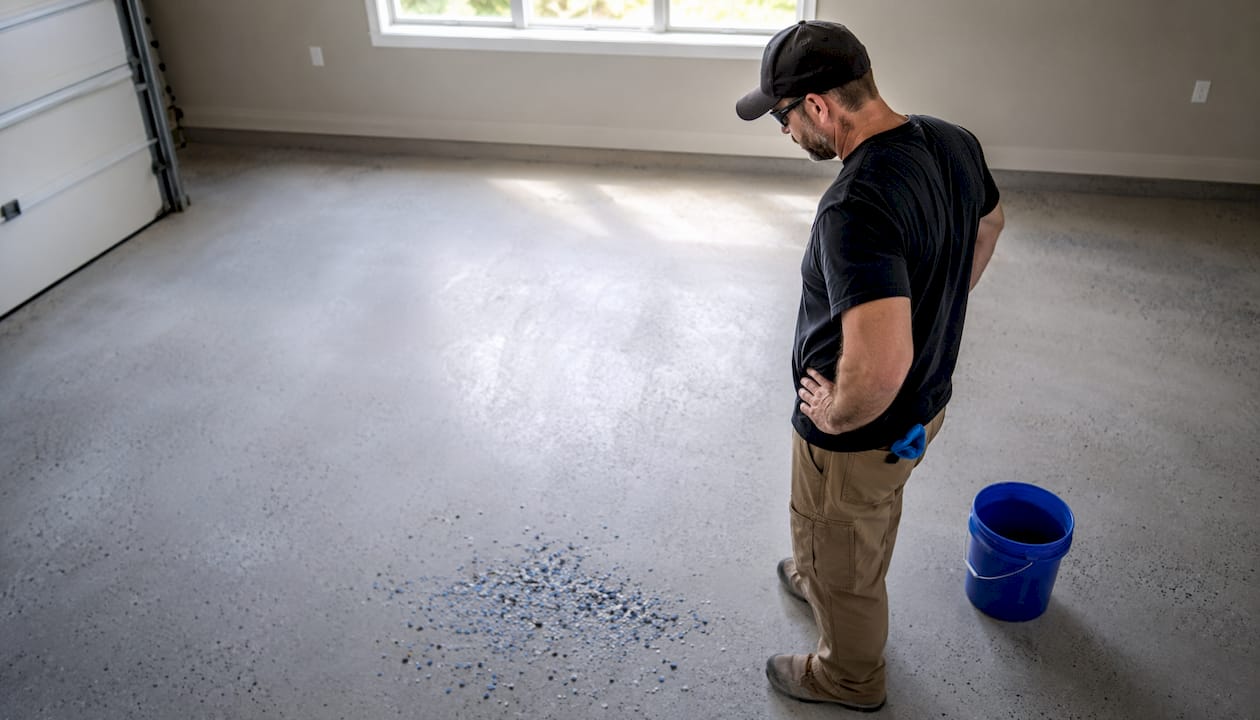
Epoxy flake floors are a three-layer coating system: an epoxy basecoat applied to prepared concrete, colored vinyl chips broadcast into the wet epoxy, then sealed with a clear topcoat such as a polyaspartic. Choose them when you need a durable, customizable, easy-to-clean finish that hides concrete imperfections and adds traction. They work best in garages, basements, workshops, showrooms, and utility rooms. If you want a plain, seamless look with no texture, solid epoxy or a metallic system is a better fit.
- Best uses: residential garages, commercial auto shops, warehouses, showrooms, utility rooms, and basements
- Skip flake epoxy when: you want a mirror-smooth, solid-color floor or need a system rated for constant chemical immersion
- Top system components: 100% solids epoxy basecoat, vinyl flake blend, polyaspartic or urethane clear topcoat
- Local option: Alldaypowerwashing installs professional flake epoxy systems in Colorado Springs and the Denver metro area
Pro Tip: Choose a polyaspartic topcoat over a standard epoxy topcoat whenever possible. Polyaspartic cures faster, resists UV yellowing, and holds up better under abrasion — three areas where standard epoxy topcoats tend to fall short over time.
Table of Contents
- How are epoxy flake floors built, layer by layer?
- What are the real benefits and drawbacks of flake epoxy?
- How do flake size, blend, and color affect the final look?
- What does a proper installation look like, step by step?
- What do epoxy flake floors cost, and how long do they last?
- How do you clean and maintain a flake epoxy floor?
- Why topcoat type and broadcast method determine long-term performance
- Should you DIY or hire a pro for your epoxy floor?
- Key Takeaways
- What installers actually see on the job
- Get a professional flake epoxy floor estimate in Colorado
- Useful sources and further reading
How are epoxy flake floors built, layer by layer?
Epoxy flake floors are not a single product — they are a system, and each layer has a specific job.
Concrete prep and primer. Before any coating goes down, the slab must be profiled. Grinding opens the concrete’s pores so the epoxy bonds mechanically rather than just sitting on the surface. A primer coat follows on porous or problem slabs to seal the substrate and improve adhesion.
Epoxy basecoat. A pre-pigmented 100% solids epoxy is rolled or squeegeed onto the prepared slab. The color of this coat shows through wherever flakes don’t fully cover, so it’s matched to the flake blend. “100% solids” means no water or solvent evaporates out — what goes on stays on, giving you maximum film thickness.
Flake broadcast. While the basecoat is still wet, vinyl chips are thrown into the air and allowed to fall onto the surface. Full broadcast to rejection means you keep throwing until the epoxy won’t accept any more flakes — the surface looks completely dry and uniform. A light or sparse broadcast uses far fewer chips, leaving visible base coat between them. Full broadcast creates a thicker, more uniform, and more durable surface; sparse broadcast is a design choice that trades some durability for a different aesthetic.
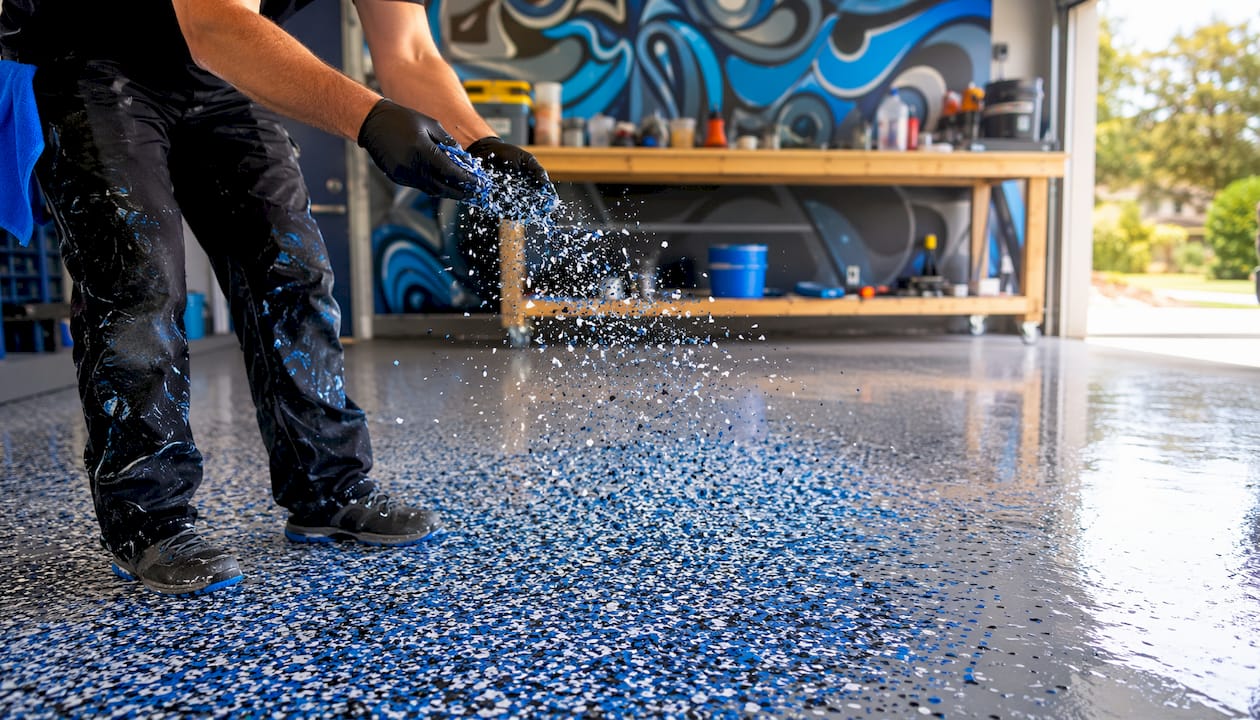
Scrape, sweep, and vacuum. Once the basecoat cures, loose and vertical flakes are scraped down with a floor scraper, swept, and vacuumed. This step flattens the surface and removes the sharp edges that would otherwise make the topcoat uneven.
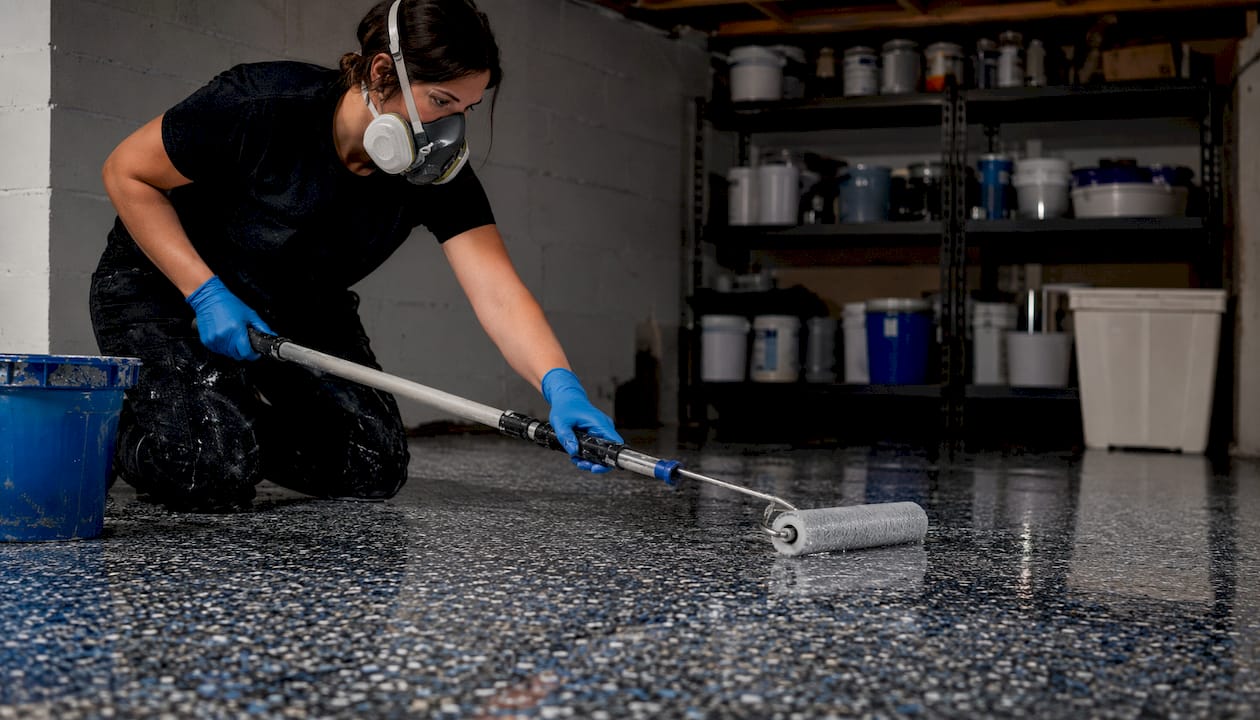
Clear topcoat. The final layer protects everything beneath it. A polyaspartic topcoat cures faster and resists UV better than most urethane options. One coat preserves more texture and traction; two coats smooth the surface and make cleaning easier. The topcoat is the actual wear layer — the flakes are decorative.
What are the real benefits and drawbacks of flake epoxy?
What flake epoxy does well
- Durability. A properly installed full-broadcast system with a quality topcoat handles vehicle traffic, dropped tools, and heavy foot traffic without cracking or peeling.
- Chemical resistance. Oil, gasoline, and most household chemicals bead up and wipe off rather than soaking into the surface.
- Hides imperfections. Hairline cracks, surface pitting, and color variation in the concrete disappear under a full flake broadcast. You don’t need a perfect slab to get a great-looking floor.
- Customizable appearance. Dozens of flake blends and base colors let you match any aesthetic, from neutral granite-style to bold, high-contrast patterns.
- Low maintenance. Sweep and mop. That’s most of it.
Where it falls short
- Slippery when wet. Because epoxy is non-porous, a wet surface can become slick. Flake texture helps, but anti-slip additives in the topcoat are worth adding in high-moisture areas.
- Fumes during installation. Solvent-based epoxies off-gas significantly during application. Ventilation is non-negotiable, and some homeowners need to vacate for 24–48 hours.
- Cure time. Light foot traffic is typically possible within a day or so, but driving on the floor should wait about a week to avoid hot-tire pickup or surface damage.
- UV yellowing risk. Standard epoxy topcoats yellow under direct sunlight. Near garage doors or in sun-exposed areas, a UV-stable polyaspartic topcoat is the right call.
How do flake size, blend, and color affect the final look?
This is where the real design decisions happen. Flake systems come in macro (approximately 1/4"), micro (around 1/16"), and glitter accent sizes, and the size you choose changes the entire character of the floor.
Macro flakes (1/4") produce a bold, speckled look with visible individual chips. They’re popular in garages and commercial spaces where a high-contrast, textured appearance is the goal. A light gray base with black and white 1/4" flakes is consistently one of the most requested patterns.
Micro flakes (1/16") blend together at a distance and read as a smooth, granite-like surface. Homeowners who want a floor that photographs well and appeals to future buyers tend to prefer micro or hybrid blends. The Juneau-style hybrid mixes 1/4", 1/8", and 1/16" chips in the same broadcast for a layered, natural stone effect.
Broadcast density matters as much as size. A full broadcast at rejection with micro flakes creates a dense, nearly solid-looking surface. The same micro flakes at a sparse broadcast show the base coat between chips and look completely different. Neither is wrong — they’re just different products.
Color selection tips: Neutral blends (grays, tans, charcoals) hold their visual appeal longer and tend to work well for resale. Bold colors and high-contrast patterns make a stronger personal statement but can feel dated. If you’re coating a commercial space, match the flake blend to your brand’s color palette for a cohesive look.
Pro Tip: Before committing to a full floor, order a small sample swatch or request a test patch from your installer. Colors look different under fluorescent garage lighting than they do on a screen or in a showroom.
What does a proper installation look like, step by step?
A professional-grade install on a standard two-car garage typically runs two to three days from start to drive-on. Here’s what that looks like:
- Clean the slab. Sweep, vacuum, and degrease the concrete. Oil stains must be treated before grinding — grinding over oil just pushes contamination deeper.
- Test for moisture. Tape a 2 ft. x 2 ft. plastic sheet to the floor and leave it overnight. Water droplets under the plastic mean the slab is retaining moisture, which will cause adhesion failure. A sodium chloride moisture test confirms severity.
- Repair cracks and spalls. Open hairline cracks with an angle grinder to about 1/8" deep, then fill with a concrete patch product. Let it cure before grinding.
- Mechanically grind the surface. A diamond-cup floor grinder profiles the concrete so the epoxy bonds properly. Acid etching alone is not sufficient on slabs with old coatings, oil contamination, or moisture issues.
- Apply primer (if needed). Porous slabs or those with moisture concerns benefit from a waterborne epoxy primer coat before the basecoat.
- Roll the epoxy basecoat. Pour the mixed 100% solids epoxy in ribbons and roll it out evenly with a 3/8" nap roller, working toward the exit.
- Broadcast flakes to rejection. Throw handfuls of chips into the air and let them fall. Keep going until the surface looks uniformly dry with no shiny epoxy showing through.
- Cure, scrape, and vacuum. After 8–10 hours, scrape down protruding flakes with a floor scraper, sweep, and vacuum thoroughly.
- Apply the clear topcoat. Roll on one or two coats of polyaspartic or urethane topcoat. A 3-gallon kit covers roughly enough for a standard two-car garage at typical mil thickness, though coverage varies with substrate porosity.
- Cure and return to service. Light foot traffic is typically safe within 16–30 hours. Wait 5–7 days before driving on the surface.
What extends the timeline: temperatures below 50°F slow cure significantly. High humidity can cause blush on the epoxy surface. Both can push a two-day job to three or four days.
What do epoxy flake floors cost, and how long do they last?
Cost depends on four main variables: substrate condition, product quality (especially % solids and topcoat type), broadcast method, and labor. Here’s a realistic breakdown:
| Option | Approximate Cost | What’s Typically Included |
|---|---|---|
| DIY kit (water-based) | — | Basecoat, flakes, urethane topcoat, basic tools |
| DIY kit (100% solids + polyaspartic) | — | Professional-grade basecoat, full flake volume, polyaspartic topcoat |
| Professional install, standard system | $3–$5 per sq ft | Grinding, basecoat, full broadcast, single topcoat |
| Professional install, full system | $5–$8 per sq ft | Full prep, 100% solids epoxy, full broadcast, polyaspartic topcoat, warranty |
For a local Colorado cost breakdown, geography and labor rates shift these numbers. Denver and Colorado Springs installs generally fall within the professional ranges above.
Lifespan depends almost entirely on prep quality and topcoat selection. A properly ground slab with a full broadcast and a quality polyaspartic topcoat can hold up for decades in a residential garage. A thin, water-based DIY system on an unground slab may start peeling within two to three years. Commercial spaces with heavy vehicle traffic typically see more wear and may need a topcoat refresh every five to ten years depending on use.
Pricing factors that move the number up: contaminated or previously coated slabs (more grinding time), larger flake volumes for full broadcast, polyaspartic vs standard urethane topcoat, and geographic labor costs.
How do you clean and maintain a flake epoxy floor?
Routine maintenance is straightforward, but a few habits protect the topcoat and extend the floor’s life significantly.
Daily and weekly care:
- Sweep or dust-mop regularly to remove abrasive grit that can scratch the topcoat
- Mop with a pH-neutral cleaner diluted in water — avoid acidic cleaners, bleach, or ammonia-based products, which can degrade the topcoat over time
- Spot-clean oil or chemical spills promptly; epoxy resists staining but prolonged contact can dull the finish
What to avoid:
- Steel wool or abrasive scrub pads
- Citrus-based degreasers (can soften some topcoat formulations)
- Dragging heavy equipment or sharp metal edges across the surface
Slip resistance upkeep: A single topcoat preserves more texture for traction but is harder to clean; two topcoats smooth the surface and make mopping easier while slightly reducing grip. If traction is a priority — say, in a garage where water tracks in regularly — keep the anti-slip additive in the topcoat and accept that cleaning takes a little more effort.
Repairs: Small chips or worn spots can often be patched with a matching epoxy and flake material. Hot-tire pickup (where the topcoat lifts when a warm tire sits on it) usually signals a low-quality topcoat or insufficient cure time rather than a flake problem. A full recoat of the topcoat layer is the right fix when wear is widespread. For routine surface care that extends any sealed floor’s life, consistent pH-neutral cleaning and prompt spill response are the two habits that matter most.
Pro Tip: Do an annual visual inspection of the topcoat. Look for dull patches, micro-scratches, or areas where water no longer beads. Catching topcoat wear early means a simple recoat — catching it late means a full system replacement.
Why topcoat type and broadcast method determine long-term performance
The flakes in a flake epoxy system are decorative. The topcoat is the actual wear layer, and the broadcast method determines how thick and uniform the system is underneath it.
A full broadcast to rejection creates a surface that is measurably thicker and more uniform than a sparse broadcast. Full broadcast systems are the standard for high-traffic residential and commercial installs precisely because the dense flake layer adds structural thickness and eliminates thin spots where the basecoat alone would be the only protection. Sparse broadcast looks different and costs less in materials, but it leaves more of the floor’s durability dependent on the topcoat alone.
Topcoat selection is where most long-term performance is won or lost. Polyaspartic topcoats cure faster, resist UV better, and provide superior abrasion resistance compared with standard urethane topcoats. For garage doors or any area with sun exposure, a UV-stable polyaspartic is not optional — standard epoxy topcoats yellow visibly within a few years in direct light.
Surface prep is also where the topcoat quality conversation starts. Even the best polyaspartic topcoat fails if it’s applied over a basecoat that didn’t bond properly to the slab.
Pro Tip: Test substrate moisture before any coating goes down. Tape a 2 ft. x 2 ft. plastic sheet to the slab and leave it overnight. If condensation forms underneath, the slab has a moisture issue that needs to be addressed with a vapor barrier primer before the basecoat — skipping this step is the single most common cause of premature adhesion failure.
Should you DIY or hire a pro for your epoxy floor?
The honest answer: a capable homeowner with the right equipment can get good results. But the margin for error is smaller than most DIY kit marketing suggests.
DIY makes sense when:
- The slab is in good condition (no major cracks, no old coatings, no oil contamination)
- You can rent or borrow a diamond-cup floor grinder
- You have adequate ventilation and protective gear
- You’re comfortable with a two-to-three day project with strict timing windows
- You’re using a professional-grade kit with 100% solids epoxy and a polyaspartic topcoat, not a box-store roll-on
Hire a pro when:
- The slab has oil stains, previous coatings, moisture issues, or significant cracks
- You want a warranty on the finished system
- The space is commercial or high-traffic
- You don’t have access to proper grinding equipment
Questions to ask any installer before you hire
| Question | Why It Matters |
|---|---|
| How do you prep the concrete? | Grinding vs acid etch tells you immediately how serious they are |
| Do you test for moisture? | No moisture test = no accountability for adhesion failures |
| What’s the mil thickness of your basecoat and topcoat? | Thin coats fail faster; get the spec sheet |
| What topcoat product do you use? | Polyaspartic vs urethane is a real performance difference |
| Do you do a full broadcast to rejection? | Partial broadcast is a cost-cutting move, not a design choice |
| What’s your warranty? | Labor and material warranty terms should be in writing |
| Can I see photos of recent local installs? | References and photos confirm real experience |
Red flags to watch for: vague answers about prep (“we clean it and etch it”), no mention of moisture testing, quotes that seem low because they’re skimping on flake volume or topcoat coats, and installers who can’t produce product data sheets on request.
Key Takeaways
Epoxy flake floors deliver durable, customizable results when two things are done right: thorough mechanical surface prep and a quality polyaspartic topcoat applied over a full broadcast.
| Point | Details |
|---|---|
| Full broadcast matters | Broadcasting flakes to rejection creates a thicker, more uniform system than sparse broadcast. |
| Topcoat is the wear layer | Polyaspartic topcoats outperform standard urethane on UV resistance, cure speed, and abrasion. |
| Prep determines adhesion | Mechanical grinding is required on contaminated or previously coated slabs — acid etching alone is not enough. |
| Cost vs lifespan trade-off | Professional full-system installs run $5–$8 per sq ft but can last decades; DIY water-based kits cost less and wear faster. |
| Alldaypowerwashing | Installs professional flake epoxy systems in Colorado Springs and Denver with insured crews and same-week quotes. |
What installers actually see on the job
The Colorado Front Range throws a few curveballs at epoxy installs that don’t come up in online guides. Temperature swings between morning and afternoon can compress your working window significantly — a basecoat that would give you 45 minutes of pot life at 70°F might give you 25 minutes on a warm spring afternoon in Colorado Springs. Dust control is another real issue: garage doors open during install invite airborne debris that lands in the wet epoxy and shows up in the cured surface.
Most homeowners who call about a flake floor have already seen a neighbor’s garage and want something similar. The conversation usually shifts when they realize how much the topcoat choice matters. A floor that looks identical on day one can look completely different at year five depending on whether a UV-stable polyaspartic or a standard urethane was used.
Alldaypowerwashing works in Colorado Springs and the Denver metro area and brings the same commercial-grade approach to residential flake floors that the team uses on commercial and industrial jobs. If you’re weighing options, a local crew that knows the climate and the concrete conditions here is worth the conversation.
Get a professional flake epoxy floor estimate in Colorado
Alldaypowerwashing installs professional epoxy floor coatings for residential garages and commercial spaces across Colorado Springs and the Denver metro area. Fully insured crews, commercial-grade equipment, and same-week quotes mean you’re not waiting weeks to get started.
The team handles full surface prep, full broadcast flake systems, and polyaspartic topcoats — the combination that actually lasts. Request a free estimate or check the project gallery to see recent local installs. If you’re in Denver, the Denver service page has local contact details and booking options.
Useful sources and further reading
Before hiring an installer or purchasing a DIY kit, review the product data sheets for your specific system. These sources are worth bookmarking:
- Sherwin-Williams Flake Flooring System — system overview, flake sizing, topcoat guidance, and slip-resistance notes from a major manufacturer
- Miracote CQ Epoxy Flake System — detailed topcoat comparison (single vs double coat) and texture/cleaning trade-offs
- One Stop Epoxy Full Flake Kits — coverage rates, kit sizing, and full broadcast guidance for DIY installs
- Amerepoxy Flake Floor Guide — practical installer perspective on prep, application, and common failure points
- Check the technical data sheet (TDS) for any epoxy or topcoat product before purchasing — it lists pot life, coverage rate, cure windows, and application temperature range, all of which affect your install plan