
Garage Floor Moisture Test: How to Check Before Coating
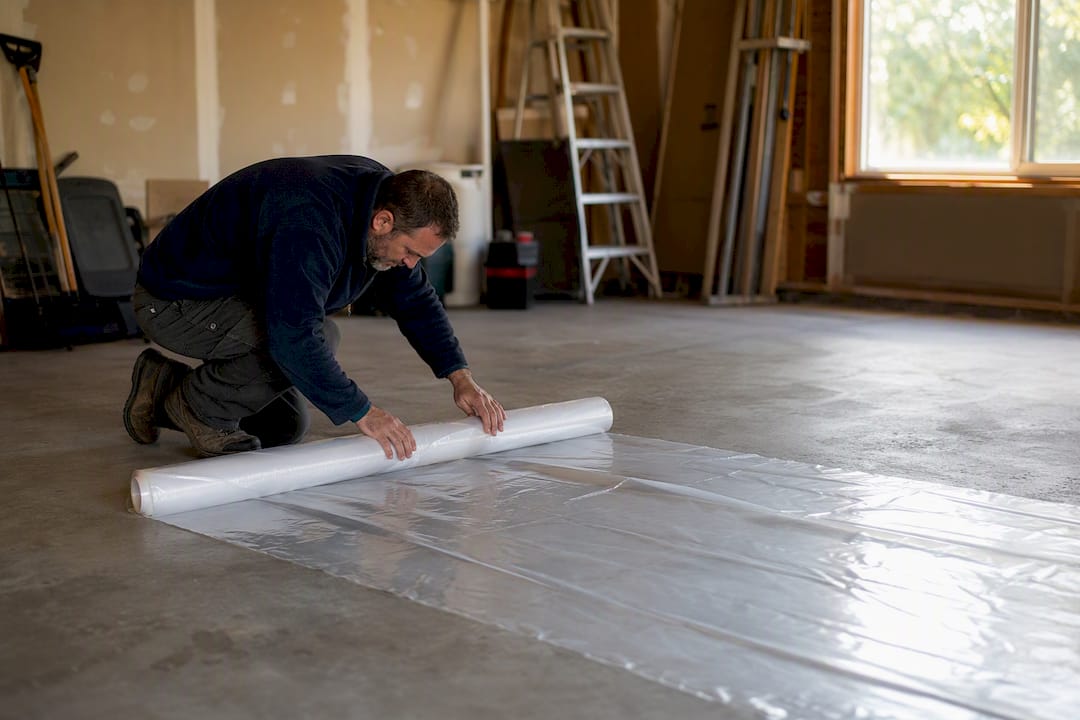
Run a plastic-sheet test (ASTM D4263) first. It costs nothing and tells you overnight whether vapor is coming through the slab at all. If it fails, or your coating manufacturer requires numbers, move to a calcium chloride test (ASTM F1869) for a moisture vapor emission rate, or an in-situ relative humidity probe (ASTM F2170) for the most predictive read on internal slab conditions. Borderline results mean one thing: skip the guesswork and get RH testing or a professional evaluation before any coating goes down.
- Plastic-sheet screen: free, DIY, yes/no answer in 16+ hours
- Calcium chloride (MVER): numeric result in 60 to 72 hours, matches most coating specs
- RH probe: most predictive for coatings, but usually needs a pro and calibrated gear
A common threshold to know: many epoxy manufacturers cap acceptable moisture vapor emission at roughly 3 lb per 1,000 square feet per 24 hours, with internal RH capped around 75%.
Key Takeaways
Choosing the right garage floor moisture test comes down to matching the method to the decision: a free plastic-sheet screen for a quick check, calcium chloride or RH testing for numbers a coating warranty will actually honor.
| Point | Details |
|---|---|
| Start with the free screen | Run a plastic-sheet test (ASTM D4263) at the threshold, perimeter, and center before spending money on kits. |
| Numeric tests unlock warranties | Calcium chloride (ASTM F1869) gives an MVER number most epoxy manufacturers require, typically capped near 3 lb/1,000 sq ft/24 hr. |
| RH probes predict best | ASTM F2170 probes read internal slab humidity, with about 75% RH as a common acceptance ceiling. |
| Fix drainage before priming | Check downspouts, grading, and door seals before assuming a primer alone will solve elevated readings. |
| Call All Day Power Washing for mitigation | All Day Power Washing tests, grinds, primes with moisture-mitigating products, and installs the topcoat with a written report and satisfaction guarantee. |
Table of Contents
- Which Garage Floor Moisture Test Should You Run First?
- How Do You Run a Plastic-Sheet Moisture Test?
- What Does the Calcium Chloride Test Actually Measure?
- Why Do Contractors Trust In-Situ RH Probes More?
- How Do You Interpret the Numbers and Fix a Wet Slab?
- Sources
Which Garage Floor Moisture Test Should You Run First?
Speed, cost, and accuracy pull in different directions, so the right first move depends on what you’re deciding. A plastic-sheet screen is free and fast but only tells you moisture is present, not how much. Calcium chloride testing gives you an actual number in 60 to 72 hours, which most epoxy and polyaspartic manufacturers want to see before they’ll honor a warranty. RH probes take longer to set up correctly and usually cost more, but they read conditions inside the slab, which makes them the better predictor of long-term coating performance.
| Test | Time | Cost | Best For |
|---|---|---|---|
| Plastic-sheet (D4263) | 16+ hours | Free (plastic, tape) | Quick pass/fail screen |
| Calcium chloride (F1869) | 60 to 72 hours | Low (kit available) | Numeric spec compliance |
| RH probe (F2170) | Similar 60 to 72 hr stabilization | Moderate to high, often pro-run | Predicting coating success |
If a manufacturer’s spec sheet or warranty document names a specific ASTM standard, that’s the test to run, not the cheapest one.
How Do You Run a Plastic-Sheet Moisture Test?
This is the test every garage owner should run before spending a dime on a numeric test. Here’s how to do it right.
- Sweep the slab and remove any oil, dirt, or old sealer residue. Bare concrete is required; a coating or curing compound can trap vapor and give you a false negative.
- Let the surface dry completely if you’ve recently pressure washed or mopped it. Surface water skews results.
- Cut three pieces of clear plastic sheeting, each about 18 inches square.
- Tape one at a door threshold, one along an exterior perimeter wall, and one near the center of the slab. Moisture problems often show up first at the perimeter or entry points, so don’t skip those spots for a single center reading.
- Seal all four edges completely with duct tape or packing tape. Gaps let ambient humidity in and ruin the test.
- Leave the sheets undisturbed for at least 16 hours.
- Peel back each sheet and check for condensation on the underside or a darkened patch of concrete underneath. Either one is a positive result.
A negative result on all three squares is a decent sign, but it’s not proof the slab is dry. Curing compounds, sealers, or testing during cold, dry winter months can mask real moisture and produce a false negative. If your first test was run in winter, repeat it in the humid season before you trust it. And if even one square comes back positive, stop here and move to a calcium chloride or RH test rather than coating over an unknown.
Pro Tip: Test the door threshold separately from the interior slab. Garage door seals fail quietly, and threshold moisture often has nothing to do with the concrete itself. Check your door hardware and weatherstripping the same day you run the plastic test.
What Does the Calcium Chloride Test Actually Measure?
The calcium chloride test measures moisture vapor emission rate, or MVER, expressed in pounds of water vapor per 1,000 square feet per 24 hours. A small dish of anhydrous calcium chloride sits sealed under a plastic dome on bare concrete, absorbing whatever vapor rises from the slab. After the test window closes, a lab weighs the dish and calculates how much moisture it picked up.
The standard test runs 60 to 72 hours, and the concrete needs to be clean, bare, and free of any coating or curing residue for the reading to mean anything. Kits typically include:
- A calibrated dish with anhydrous calcium chloride
- A clear plastic dome and adhesive to seal it to the slab
- Instructions for weighing before and after, or a prepaid mail-in lab option
Most epoxy primer manufacturers set their acceptance limit around 3 lb per 1,000 square feet per 24 hours. Below that, a standard epoxy system is usually fine. Above it, you’re looking at a moisture-mitigating primer or further diagnosis.
The test has real limits, though. It only measures what’s escaping from the surface at the time of the test, not what’s happening deeper in the slab, and results can shift with temperature and humidity in the garage during testing. A DIY kit is reasonable for a single-car garage with no history of dampness. For anything borderline, commercial, or tied to a manufacturer warranty, a contractor running the test properly with lab-verified results is worth the cost.
Why Do Contractors Trust In-Situ RH Probes More?
In-situ relative humidity testing reads moisture conditions inside the slab’s pore structure, not just what’s escaping at the surface. That distinction matters because film-forming coatings fail from vapor pressure building up underneath them, and RH probes catch that condition directly instead of inferring it from surface emission.
Here’s how the test works in practice:
- A technician drills a hole to roughly 40% of the slab’s thickness, since that depth reflects the slab’s equilibrated humidity rather than surface conditions skewed by recent weather or cleaning.
- A sleeve or probe sensor goes into the hole and needs time to stabilize, typically in a similar 60 to 72 hour window as the calcium chloride test.
- The sensor reports internal relative humidity as a percentage.
Readings above that usually call for a moisture-mitigating primer or further investigation before any topcoat goes on.
RH testing sidesteps a problem that trips up surface-based tests: it isn’t fooled by a curing compound, a recent rain, or a garage that just got hosed down. That reliability is also why it usually requires a professional. Calibrated probes, proper drilling depth, and correct data logging aren’t a weekend project for most homeowners, and a bad installation gives you a confidently wrong number.
How Do You Interpret the Numbers and Fix a Wet Slab?
Once you’ve got a result, compare it against the two numbers that matter most: roughly 3 lb per 1,000 square feet per 24 hours for calcium chloride, and roughly 75% for internal RH. Coating manufacturers publish their own tolerances, and those override generic guidance, so check the technical data sheet for whatever product you’re planning to use.
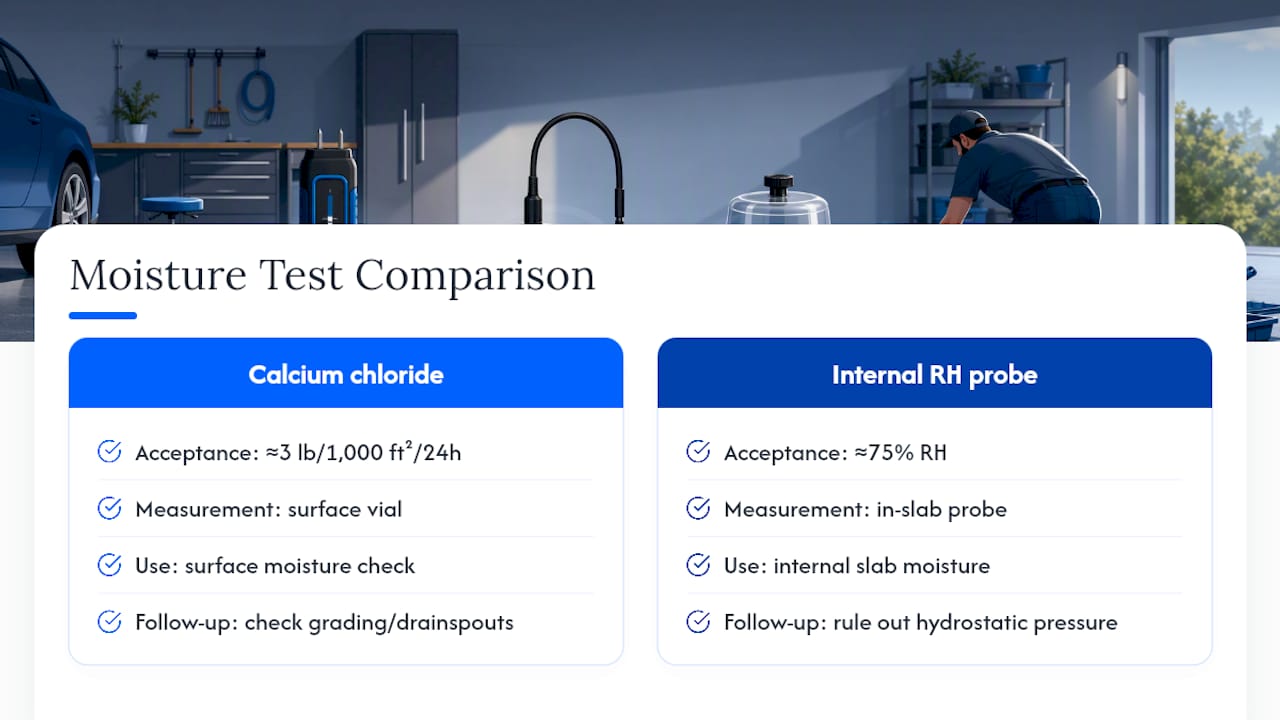
Before assuming the concrete itself is the problem, look outside. Check that downspouts drain away from the foundation, grading slopes away from the garage, and door seals aren’t letting water track in along the threshold. Cracks in the slab and any sign of hydrostatic pressure pushing water up from below need to be ruled out, because primers alone won’t fix an active water source; that requires drainage correction first.
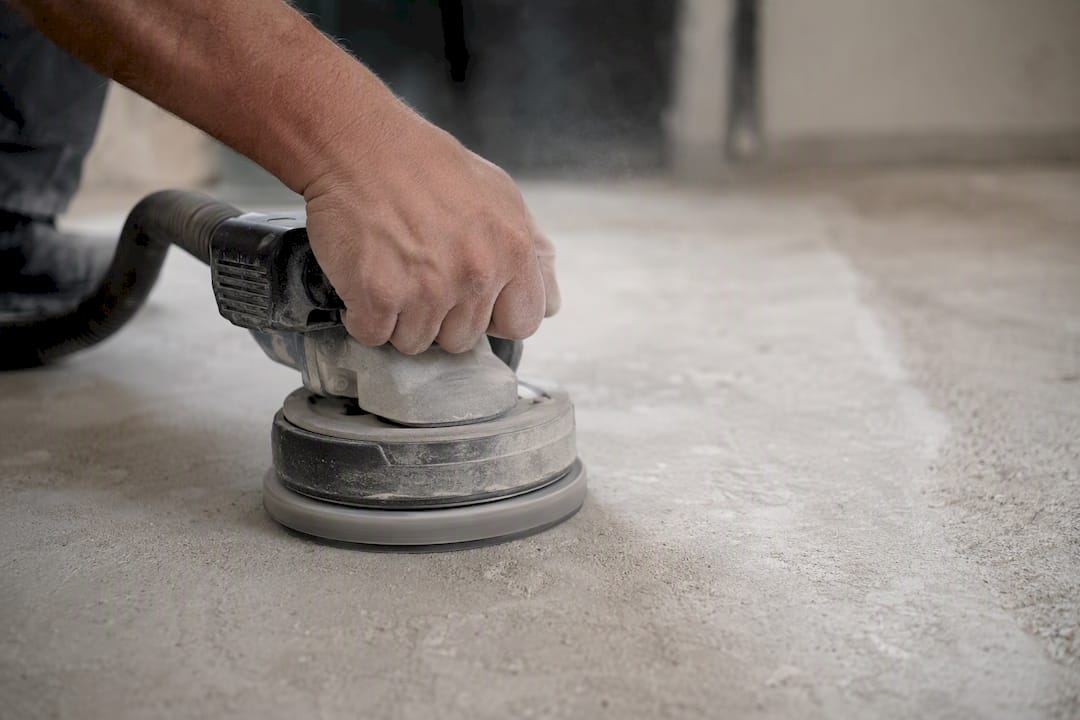
If the slab tests above acceptance limits and there’s no active water intrusion, moisture-mitigating primers are the standard fix. Products like LABPOX MVB FAST are formulated as high-performance epoxy vapor barriers that let a film-forming topcoat go over a slab that would otherwise reject it. That still means mechanical grinding to open the surface profile, a compatible primer coat, and body coats applied per the manufacturer’s exact instructions. Skip a step or mismatch products, and you can trap moisture under a coating instead of solving the problem.
Pro Tip: If you’re comparing the cost of mitigation against just leaving the floor bare, it helps to see what a full coating project actually runs. Our epoxy garage floor cost guide breaks down typical pricing so you’re not deciding blind.
When Should You Call in a Professional?
Some situations aren’t worth handling yourself. Call a pro when the plastic-sheet test fails, when calcium chloride or RH numbers sit right at the acceptance line, when a previous coating already failed on this slab, or when you suspect hydrostatic pressure. Large garages and commercial floors also warrant professional testing simply because the cost of a coating failure scales with square footage.
A quality report should include readings from multiple sample points, not just one, with the ASTM method named for each test run. Ask for documented numbers, a written mitigation recommendation if needed, and a clear quote before work starts. When vetting a contractor, request a sample report from a past job, proof their instruments are calibrated, and a couple of references you can actually call.
What Do Installers See in the Field That Homeowners Miss?
A slab that looks bone dry can still fail a moisture test, especially near the door threshold and perimeter walls where problems hide longest. Visual inspection alone tells you almost nothing. If a result comes back borderline, test more than one spot and retest in a different season before trusting a single reading.
If your garage door hardware or weatherstripping looks compromised during inspection, a resource like Valiant’s garage door condition assessments is a useful reference for spotting the kind of seal failures that let water track in at the threshold.
— Brandon
How All Day Power Washing Handles Moisture Testing and Coating Prep
If your plastic-sheet test failed, or your numbers landed close to the line, All Day Power Washing coordinates the testing and does the mitigation work in one pass instead of leaving you to piece it together yourself.

Our crews handle the full sequence: moisture evaluation, mechanical grinding to open the slab’s surface profile, moisture-mitigating primer application when a slab needs it, and epoxy or polyaspartic topcoats installed to spec. You get a written report with a test map showing exactly where readings were taken, a mitigation plan if the numbers call for one, and a project backed by our satisfaction guarantee. No guessing about whether the crew that quoted the job is the crew that shows up. Get a quote for your Denver-area garage floor and we’ll walk you through what your slab actually needs before any coating goes on.
Sources
- How to test concrete for moisture before you buy epoxy
- ASTM F1869 - Measuring Moisture Vapor Emission Rate
- Moisture testing methods compared: calcium chloride vs RH testing