
Metallic Epoxy Floors: What Homeowners and Pros Need to Know
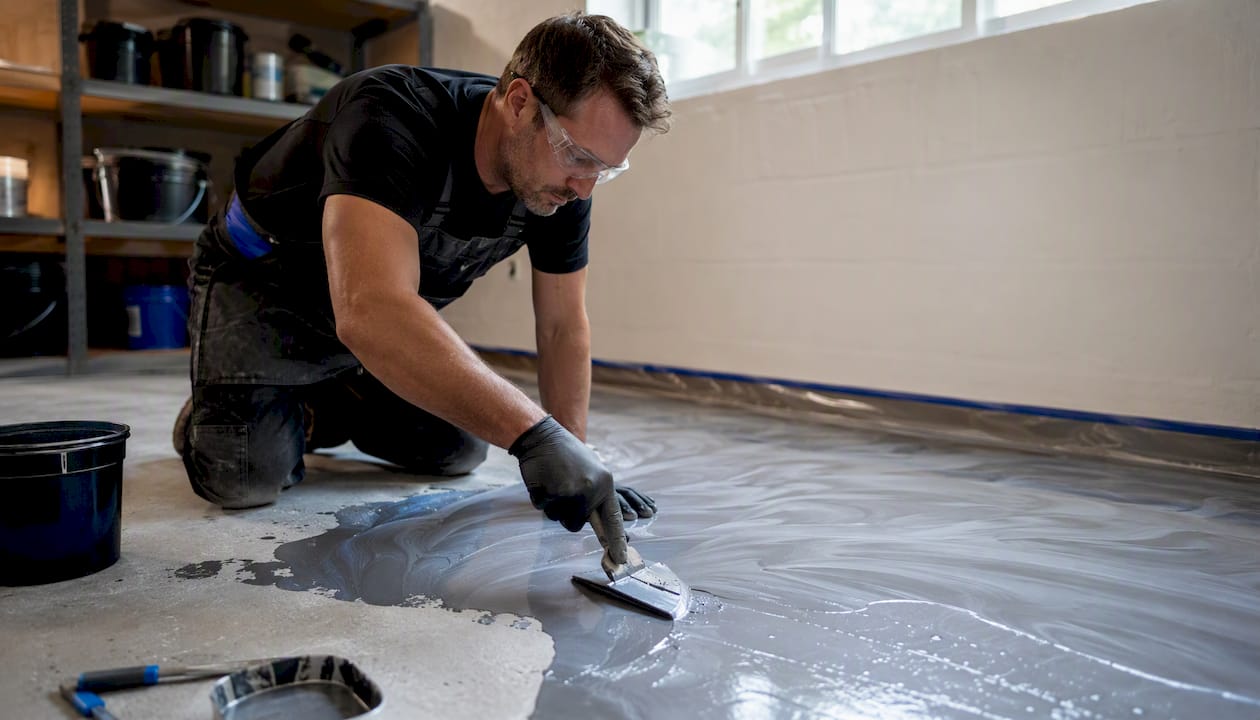
Metallic epoxy floors are the right call for design-forward interior spaces where aesthetics matter as much as durability. For most homeowners, hiring a professional installer is the smarter move. Installed costs for residential metallic epoxy floors typically range from $8–15 per square foot, while DIY kit materials usually cost $3–5 per square foot. That gap looks tempting until you factor in the prep work, the learning curve, and the cost of a failed pour. Before you do anything else: get a moisture test on your slab and an itemized contractor quote. If you’re set on DIY, buy a kit and practice on a mock-up board first.
Table of Contents
- What are metallic epoxy floors, and how do they work?
- What are the real pros and cons of metallic epoxy?
- How much does metallic epoxy cost, and what does a kit cover?
- Should you DIY a metallic epoxy kit or hire a pro?
- What does the installation process look like, step by step?
- What design styles and patterns can you get?
- Where does metallic epoxy work well, and where does it fail?
- How do you maintain a metallic epoxy floor, and how long will it last?
- How do you find and evaluate a metallic epoxy installer?
- Why substrate prep and moisture control determine whether your floor lasts
- Key Takeaways
- What most guides get wrong about metallic epoxy
- Alldaypowerwashing installs metallic epoxy floors in Denver and Colorado Springs
- Further reading and authority sources
What are metallic epoxy floors, and how do they work?
A metallic epoxy floor is a multi-layer coating system where mica- and iron-oxide-based pigment powders are suspended in clear epoxy resin. Those particles reflect and refract light at different angles as the epoxy cures, producing the 3D, liquid-metal effect that makes this finish so distinctive. No two floors look identical because the pigments keep moving until the resin locks them in place.
The typical layer stack runs like this:
- Substrate prep: Concrete grinding or shot-blasting to open the surface and remove contaminants
- Moisture-mitigating primer: Applied when vapor drive is detected; this layer is non-negotiable on slabs with any moisture reading
- Base coat: A solid or tinted epoxy layer that sets the background color (black, white, or a neutral tone)
- Metallic coat: Clear epoxy mixed with metallic pigment, spread and manipulated while wet
- Clear topcoat: Polyaspartic, polyurethane, or urethane applied over the cured metallic layer for protection and sheen
Working time is everything in the metallic layer. Slow-set epoxy formulations are the professional standard because the extended pot life gives installers time to push pigments into swirls, waves, or directional flows before the resin gels. Rush it, and the pattern either freezes mid-move or turns muddy.
What are the real pros and cons of metallic epoxy?
The case for it: The visual impact is hard to match with any other floor coating. A well-executed metallic floor in a showroom or garage looks like poured metal or polished stone. Beyond aesthetics, a properly topcoated metallic system resists chemicals, abrasion, and everyday scuffs. According to SUNDEK, a well-maintained metallic epoxy floor in average daily-use interior conditions can last about 20 years. The seamless surface means no grout lines to trap dirt and no seams to lift.
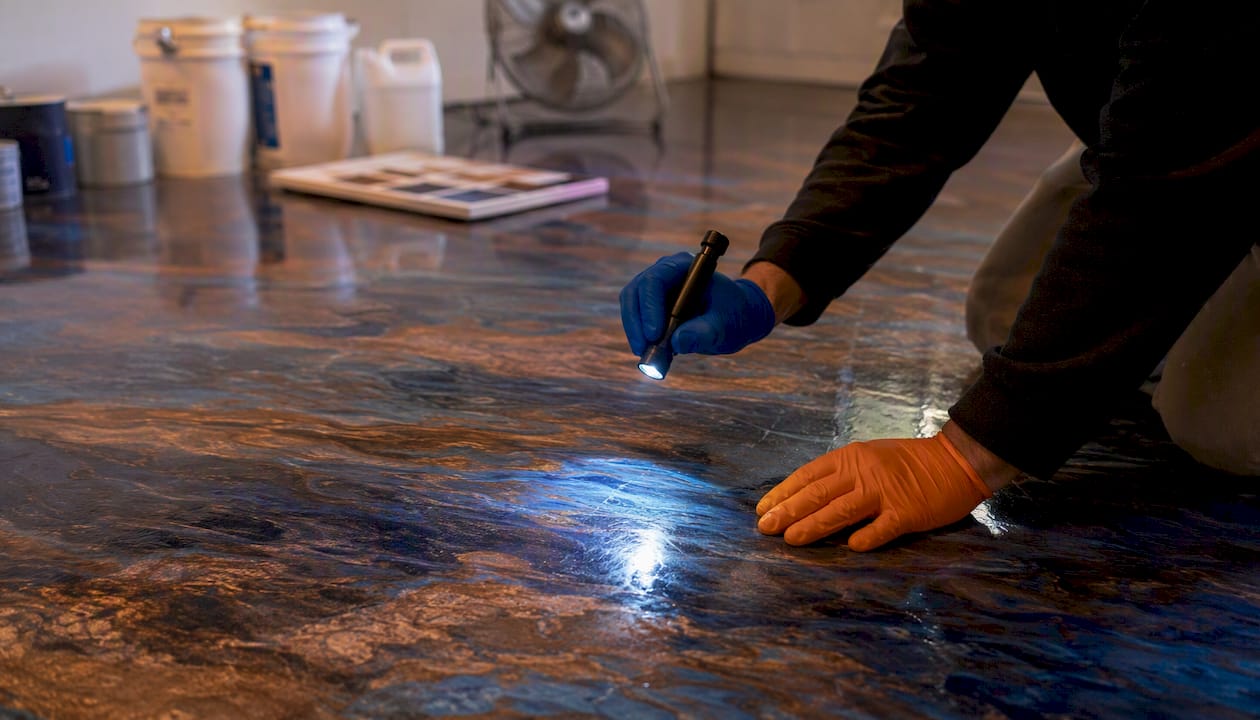
The case against it: Metallic epoxy shows scratches more readily than textured flake systems, so a durable topcoat and non-skid additives are worth the extra cost if you expect foot traffic or wet conditions. UV exposure degrades the resin and fades pigments, which rules it out for any exterior application. The biggest failure mode is moisture: vapor pushing up through the slab will lift the coating from below, and once delamination starts, the repair is essentially a full reinstall.
Pro Tip: Set pattern expectations before the crew arrives. Installers can influence the swirl direction and general flow, but they cannot replicate a sample photo exactly. Every metallic floor is organic. If you need a specific look, ask for a small mock-up on a board first.
How much does metallic epoxy cost, and what does a kit cover?
The installed price for residential metallic epoxy typically ranges from $8–15 per square foot, depending on pattern complexity, the number of pigment colors, and the topcoat type; commercial projects with tighter tolerances or larger continuous areas often exceed this range.
DIY kit materials generally cost $3–5 per square foot. Kits often come in sizes intended to cover medium-sized garages and typically include primer, metallic powder, and basic tools. Coverage claims may be optimistic due to surface porosity and application thickness, so expect somewhat less coverage than the label states.
For a full cost picture, budget for these line items beyond the kit or base labor rate:
- Concrete grinding or shot-blasting costs depend on surface area and condition.
- Crack repair and patching (varies by slab condition)
- Moisture-mitigating primer adds additional cost when needed.
- Non-skid additive for topcoat
- Ventilation equipment rental for DIY installs
- Disposal of grinding dust and waste material
For a detailed local cost breakdown, the epoxy garage floor cost guide covers Colorado-specific pricing and what drives the numbers up or down.
Should you DIY a metallic epoxy kit or hire a pro?
The honest answer depends on four things: your slab condition, the pattern complexity you want, how much traffic the floor will take, and whether you can live with a result that doesn’t match the sample photo.
DIY makes sense when:
- The slab is in good condition with no visible cracks, no moisture issues, and a clean surface
- You want a simpler single-color metallic finish rather than a complex marble or lava pattern
- The space is low-traffic (a workshop, storage area, or rarely used garage bay)
- You have access to proper PPE, ventilation, and are willing to practice on a mock-up first
Hire a pro when any of these apply:
- Moisture testing shows vapor drive above the manufacturer’s threshold
- The concrete has significant cracks, spalling, or previous coating failures
- You want a dramatic pattern (ocean wave, galaxy, multi-pigment lava flow) that requires technique developed over multiple installs
- The garage sees daily vehicle traffic and you need a topcoat rated for hot-tire pickup resistance
- The space is commercial or client-facing, where a failed floor is a business problem
Consumer kits use lower-solids formulations than professional-grade materials, which affects both durability and working time. Ventilation is also a real safety concern: epoxy fumes in an enclosed garage without forced-air exchange can reach hazardous concentrations. If you go DIY, a respirator rated for organic vapors and a box fan setup venting to the outside are not optional.
Red flags that should end the DIY conversation: any visible efflorescence (white salt deposits) on the slab, a previous coating that peeled, or a garage slab poured directly on grade without a vapor barrier.
What does the installation process look like, step by step?
A professional metallic epoxy install on a standard two-car garage usually takes several days from start to final cure. Here’s what that looks like:
- Surface preparation (Day 1, 4–8 hours): Grind or shot-blast the entire slab to a concrete surface profile (CSP) of 2–3. Fill cracks and divots with polyurea or epoxy filler. Allow repairs to cure fully before proceeding.
- Moisture testing (Day 1, after prep): Run a calcium chloride test or an in-situ relative humidity probe per ASTM F1869 or ASTM F2170. Results determine whether a moisture-mitigating primer is required.
- Primer coat (Day 1 or Day 2): Apply moisture-mitigating primer if indicated, or a standard penetrating primer on dry slabs. Allow to cure per the product datasheet (typically 8–12 hours).
- Base coat (Day 2): Roll a solid-color epoxy base. This layer sets the background that shows through the metallic coat. Cure time before recoat: typically 12–24 hours at 70°F.
- Metallic coat (Day 2 or Day 3): Mix metallic pigment into clear epoxy and pour onto the cured base. Spread with a squeegee, then manipulate with a brush, roller, or leaf blower to develop the pattern. Working time with slow-set resin lasts several minutes and varies with temperature.
- Clear topcoat (Day 3 or Day 4): Apply polyaspartic, polyurethane, or urethane topcoat. This layer determines final sheen, chemical resistance, and slip resistance.
- Cure and return to use: Light foot traffic typically resumes after 24 hours. Vehicle traffic requires a longer wait.
| Topcoat Type | Tack-Free | Recoat Window | Full Cure / Vehicle Traffic |
|---|---|---|---|
| Polyaspartic | About an hour or two | A few hours | About a day |
| Polyurethane | Several hours | Half a day to a day | Several days |
| Epoxy clear coat | Several hours | Half a day to a day | About a week |
Temperature and humidity matter more than most homeowners expect. Epoxy applied below 50°F cures slowly and can blush (turn milky). Above 85°F, pot life shrinks fast enough to freeze the metallic pattern before it’s fully developed. Aim for moderate temperature and humidity conditions conducive to curing epoxy.
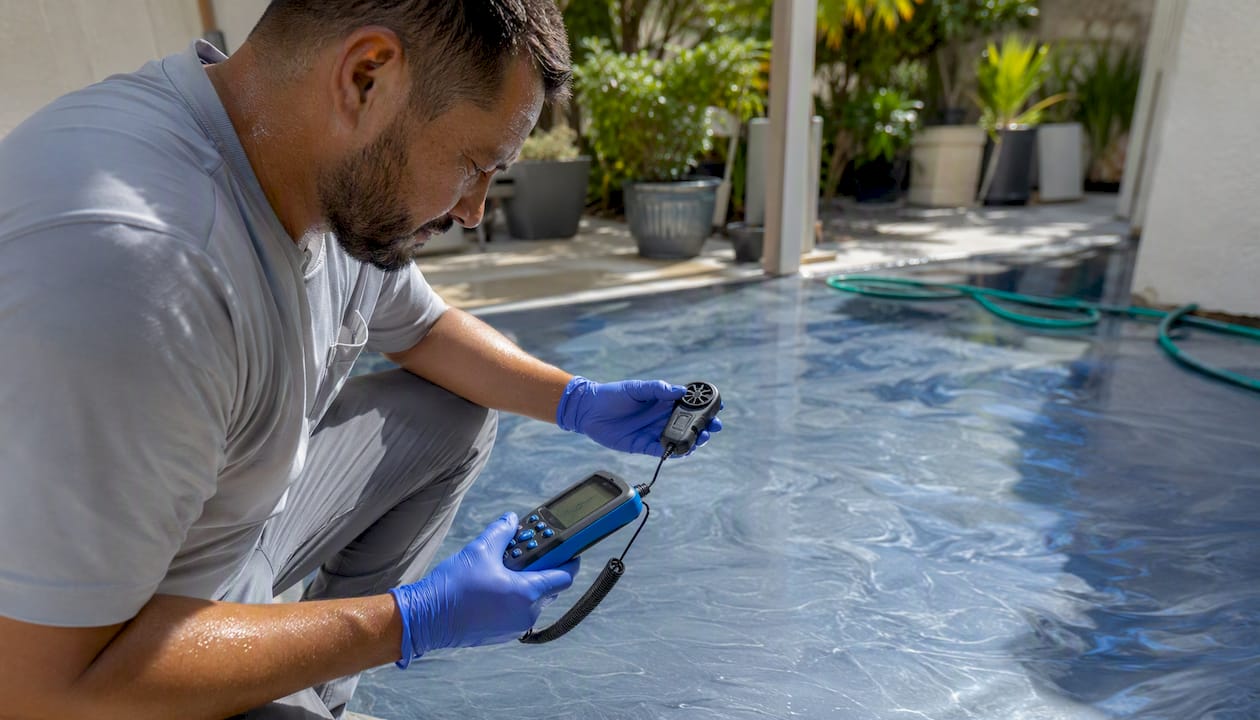
Pro Tip: Ask your installer for the product technical datasheet on the topcoat. It will list solids percentage, VOC content, and the manufacturer’s stated cure times. Any installer who can’t produce it is guessing at the schedule.
What design styles and patterns can you get?
The five main pattern families cover most of what you’ll see in portfolios:
- Marble swirl: Circular and figure-eight tool passes create veining that reads like natural stone. Works well in smaller rooms where the detail can be appreciated up close.
- Lava flow: Directional passes with a squeegee or brush produce wide, flowing channels. Needs a larger continuous floor area to develop properly; small rooms tend to look smeared rather than dramatic.
- Ocean/wave: A leaf blower or heat gun pushes wet pigment into ripple patterns. The effect is strongest in open spaces like showrooms or large basements.
- Galaxy/cosmic: Multiple pigment colors layered and blended create a deep, starfield effect. Typically requires a dark (black or navy) base coat and at least two contrasting metallics.
- Solid metallic: A single pigment color with minimal manipulation. The most forgiving for DIYers and the most consistent result across different installer skill levels.
Pigment choice shapes the outcome as much as technique. Single-color metallics (copper, silver, gold, bronze) are predictable and pair well with most base coat colors. Duo-chrome and chameleon pigments shift color depending on the viewing angle, which reads as more dynamic but is harder to control. A black base coat intensifies depth and contrast; a white base coat produces a lighter, more reflective finish.
Pro Tip: Pull portfolio photos from the installer’s actual past jobs, not manufacturer stock images. The same pigment looks completely different depending on the base coat color, the installer’s technique, and the room’s lighting. A sample board made on a scrap piece of concrete is the most reliable preview you can get.
Where does metallic epoxy work well, and where does it fail?
Metallic epoxy performs best on interior concrete in controlled environments. Garages used as showrooms or hobby spaces, finished basements, retail lobbies, and commercial showrooms are the ideal applications. The combination of low UV exposure, stable temperature, and a concrete substrate gives the system the conditions it needs to last.
It’s a poor fit for exterior surfaces. UV breaks down epoxy resin and fades metallic pigments within one to two seasons of direct sun exposure. Wood substrates flex with humidity changes, and epoxy doesn’t bond to wood movement well enough to avoid cracking. Slabs with unresolved moisture or vapor drive are the highest-risk scenario: no amount of topcoat compensates for a primer layer that’s being pushed off from below.
For spaces where metallic epoxy isn’t the right answer, the alternatives worth considering are:
- Flake/quartz broadcast systems: Better slip resistance, more forgiving on imperfect slabs, and easier to repair. When comparing flake vs metallic epoxy, flake wins on practicality; metallic wins on visual impact.
- Polished concrete: No coating to delaminate, but requires a slab in good condition and doesn’t hide surface flaws.
- Polyaspartic-only systems: Faster cure, UV-stable options available, and suitable for daily-driver vehicle garages.
For a side-by-side look at epoxy flooring options across system types, the best epoxy garage floor coatings comparison covers the main alternatives.
How do you maintain a metallic epoxy floor, and how long will it last?
A well-maintained metallic epoxy floor can have a long lifespan in residential interior conditions. That number assumes correct installation, a quality topcoat, and consistent basic care.
The maintenance routine is straightforward:
- Daily: Sweep or dust-mop to remove grit. Stone particles tracked in from outside act like sandpaper on the topcoat.
- Spills: Clean immediately. Metallic epoxy resists most chemicals, but prolonged contact with harsh solvents or acids can etch the topcoat.
- Monthly: Inspect for surface scratches, dull patches, or any areas where the topcoat looks thin.
- Cleaning: Mop with a pH-neutral cleaner. Avoid ammonia-based products, which degrade epoxy topcoats over time.
- Mats: Place rubber-backed mats at entry points to reduce tracked grit and moisture.
Hot-tire pickup is the most common complaint in vehicle garages. It happens when a car parks on epoxy shortly after driving, and the heat from the tires softens the surface enough to pull the coating when the car moves. A polyaspartic topcoat rated for hot-tire resistance, or a polyurethane finish with adequate film build, largely eliminates this problem.
For residential use, plan periodic resealing or topcoat refreshes depending on traffic. Commercial spaces with daily foot traffic may need more frequent attention. When the topcoat shows consistent dullness or light scratching across the whole floor, that’s the signal to recoat before the metallic layer underneath gets exposed.
How do you find and evaluate a metallic epoxy installer?
The difference between a 20-year floor and a floor that peels in two years usually comes down to who installs it. Here’s how to vet contractors before signing anything:
- Ask for metallic-specific experience. General epoxy experience doesn’t transfer directly. Ask how many metallic installs they’ve completed and request photos of actual finished jobs, not manufacturer renders.
- Request a moisture-testing procedure. Any professional installer should describe their moisture-testing method before quoting. If they don’t mention it, ask specifically whether they use calcium chloride or in-situ RH probes.
- Get the product datasheets. Ask for the technical datasheet on the primer, the metallic coat, and the topcoat. Solids percentage and VOC content are the two numbers that matter most for durability and safety compliance.
- Review the warranty terms in writing. Understand what voids the warranty (improper cleaning products, surface damage) and what the contractor will cover if delamination occurs within the warranty period.
- Ask for a sample board or mock-up. A confident installer will produce a small demonstration piece showing the pattern style and color combination you’ve discussed.
Red flags to walk away from:
- No mention of moisture testing in the quote or conversation
- Verbal-only guarantees with nothing in writing
- A flat per-square-foot quote that doesn’t itemize prep, materials, and labor separately
- Pressure to approve change orders on the day of installation without documentation
- No portfolio of completed metallic installs (not flake, not solid color — metallic specifically)
You can also check contractor reviews on platforms like Trustpilot and the BBB to cross-reference reputation before committing.
Why substrate prep and moisture control determine whether your floor lasts
Moisture in the slab is the leading cause of metallic epoxy delamination. Vapor pushing up through concrete creates pressure between the slab and the primer layer, and once that bond breaks, the entire coating system lifts. No pigment choice, no topcoat, and no installer skill compensates for skipping this step.
The professional workflow on any problematic slab follows a clear sequence: test first (calcium chloride or ASTM F2170 in-situ RH probe), grind to open the surface, apply a moisture-mitigating primer rated for the measured vapor emission level, then proceed with the base coat, metallic coat, and topcoat only after each layer has cured within spec.
Slow-set resin systems are the deliberate choice for the metallic coat itself. The longer pot life allows installers to develop patterns without rushing, and it reduces the chance of roller marks freezing into the surface before the pigments have settled. Over-manipulation muddies the pigments; under-manipulation leaves flat, unworked patches. The technique window is real, and it’s narrow.
SUNDEK’s guidance confirms that a properly installed and maintained metallic epoxy floor can reach a 20-year lifespan in residential conditions. That figure assumes moisture mitigation was addressed correctly at the start.
Pro Tip: Before any work begins, ask the installer for the written moisture test results. A calcium chloride test result or a relative humidity reading from an in-situ probe is a document you should have in hand. If the installer can’t produce one, that’s your answer about how the rest of the job will go.
Key Takeaways
Metallic epoxy floors can deliver a long lifespan in residential interiors when moisture is mitigated correctly, the substrate is properly prepared, and a quality topcoat is applied.
| Point | Details |
|---|---|
| Hire a pro for most installs | Moisture issues, pattern complexity, and vehicle garages all favor professional installation over DIY kits. |
| Budget $8–15 per square foot installed | DIY materials run $3–$5/sq ft, but prep costs and kit limitations close the gap quickly. |
| Moisture testing is non-negotiable | Vapor drive is the leading cause of delamination; insist on documented test results before work starts. |
| Lifespan reaches 20 years | Correct installation, a durable topcoat, and consistent maintenance are what get you there. |
| Alldaypowerwashing serves Colorado | For Denver and Colorado Springs homeowners, Alldaypowerwashing offers professional metallic epoxy installs with moisture testing, substrate prep, and same-week quotes. |
What most guides get wrong about metallic epoxy
The conventional wisdom on metallic epoxy floors frames the DIY vs pro decision almost entirely around cost. That framing misses the real variable: substrate condition. A homeowner with a dry, well-poured slab in a climate-controlled space can get a solid result from a quality kit. A homeowner with a slab that has any vapor drive, any previous coating failure, or any significant cracking is not facing a cost decision. They’re facing a technical problem that a $400 kit cannot solve.
The other thing most guides underplay is pattern control. Manufacturers and influencer videos make metallic epoxy look like a pour-and-swirl process. In practice, the technique window is tight. The difference between a marble swirl and a muddy smear is often thirty seconds of working time and the right tool pressure. Installers who do this regularly have developed muscle memory for it. First-timers, even careful ones, frequently produce results that look nothing like the portfolio photos that sold them on the system.
That doesn’t mean DIY is always wrong. It means the mock-up step is mandatory, not optional. Practice the pour, the spread, and the manipulation on a scrap board before you touch the actual floor. The cost of a practice kit is the cheapest insurance you can buy.
Alldaypowerwashing installs metallic epoxy floors in Denver and Colorado Springs
If you want a metallic floor done right the first time, Alldaypowerwashing handles the full scope: moisture testing, concrete grinding, substrate repair, multi-coat metallic systems, and topcoat selection matched to your traffic level. Every install starts with a documented moisture test and an itemized quote that separates prep, materials, and labor so you know exactly what you’re paying for.
Alldaypowerwashing serves homeowners and commercial clients across Denver and Colorado Springs with fully insured crews and commercial-grade equipment. Same-week estimates are available, and the work comes with a satisfaction guarantee. Whether you’re coating a showcase garage, a finished basement, or a retail showroom, the process starts with an honest assessment of your slab.
Get a quote online or call to schedule your estimate. You can also review the full range of epoxy floor coating services to see system options, topcoat choices, and portfolio photos before you commit.
Further reading and authority sources
These sources cover technical datasheets, design inspiration, and installation guidance for readers who want to go deeper before making a decision.
- SUNDEK: Metallic Epoxy Floor — Manufacturer guidance on lifespan expectations, maintenance, and system specifications.
- Concrete Floor Supply: Metallic Epoxy Floor Guide — Detailed installation walkthrough covering slow-set resin selection and pigment manipulation technique.
- Epoxy Pro: 6-Gallon Metallic Epoxy Kit — Kit product page with coverage specs, included components, and application notes for a two-car garage.
- ShowFloor AI: Metallic Epoxy Flooring Ideas and Designs — Contractor-oriented guide covering installed pricing, pattern families, and design considerations.
- ShowFloor AI: 20 Metallic Epoxy Floor Ideas — Design inspiration gallery with notes on pigment selection, base coat color, and wear characteristics.
- TCF West: How to Create a Stunning Metallic Epoxy Floor — Practical overview of the coating system, pattern families, and what to expect from the installation process.
- 4 Corners Concrete Coatings: Metallic Epoxy Floor Designs and Colors — Installer perspective on design outcomes, color selection, and realistic expectations for finished floors.
- Alldaypowerwashing: Epoxy Garage Floor Cost in Colorado — Local pricing guide with itemized cost components for Colorado Springs and Denver homeowners.
- Exterior Genie: Garage Construction in Midlands, SC — Useful for homeowners pairing a new floor coating with a garage build or renovation project.