

Make Your Garage Floor Last 10–20 Years With Solid Color Epoxy Floors
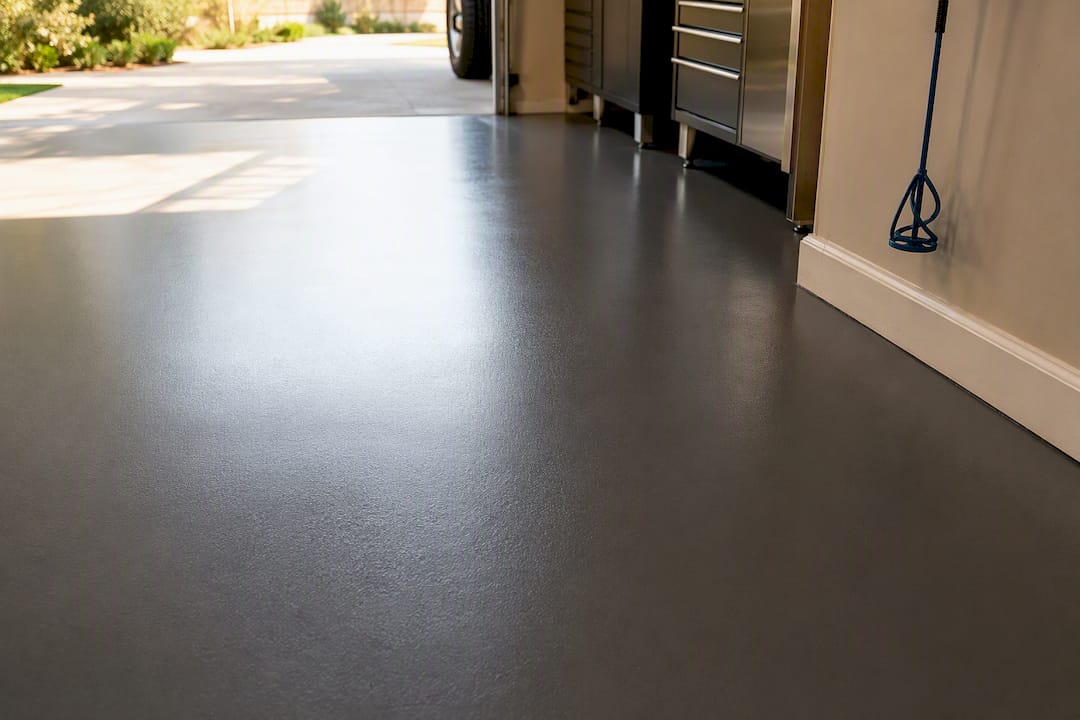
Solid color epoxy is the right call if you want a durable, easy-to-clean garage or basement floor and you’re willing to do real surface prep first. It’s a bad idea if you’re hoping to skip grinding the concrete or you’re pouring it over a slab with a known moisture problem. Most homeowners can DIY a one-car or two-car garage; hire a pro when the slab is cracked, damp, or you’re chasing a flawless commercial-grade finish.
TL;DR:
- Proper surface preparation, including grinding and moisture testing, is essential for a durable epoxy floor that resists peeling and adhesion failure.
- A 100% solids epoxy offers a thicker, tougher film than water-based options, which is crucial for floors exposed to tires, tools, and foot traffic over many years.
- DIY installation requires managing a short pot life, correct coating thickness, and premixing in small batches, with professional help recommended for larger or more complex projects.
- Installation over damp slabs or with crack repairs increases failure risk; using a slip-resistant additive and UV-stable topcoat extends the floor’s lifespan.
- A typical epoxy floor lasts 10 to 20 years with regular maintenance such as sweeping, damp mopping, prompt spill cleanup, and periodic re-coating of high-traffic areas.
Table of Contents
- What Is a Solid Color Epoxy Floor System?
- Is Solid Color Epoxy Worth It for Your Garage?
- What Product Specs Actually Matter for a DIY Install?
- How Much Epoxy Do You Need, and What Will It Cost?
- Why Does Surface Prep Make or Break the Floor?
- What Does the Application Process Actually Look Like?
- When Can You Drive on It, and How Do You Know It’s Cured?
- How Long Does a Solid Color Epoxy Floor Actually Last?
- Should You DIY This or Call a Pro?
- Get Your Garage Floor Prepped and Coated Right
- Where This Article’s Technical Claims Come From
- Sources
What Is a Solid Color Epoxy Floor System?
A solid color epoxy floor is a single, uniform hue coating built in layers, not a one-can paint job. It’s the simplest of the three common epoxy floor design options: solid color, decorative flake (chips broadcast into a base coat for texture and hide), and metallic (pigments manipulated with solvents or air to create marbled, three-dimensional effects). Solid color skips the visual complexity and delivers a clean, monochrome surface, which is exactly why it dominates garages, basements, and utility rooms where looks matter less than performance.
The system itself has three parts. First comes a primer, or a moisture vapor barrier (MVB) if the slab tests damp. Next is the pigmented color coat, ideally a 100% solids epoxy applied at a coverage rate consistent with typical commercial solid color epoxy floors, achieving adequate film thickness, according to product specs from One Stop Epoxy. Last is a protective topcoat, usually polyaspartic or urethane, that adds abrasion resistance and UV stability.
The “100% solids” distinction matters more than most buying guides let on. Water-based and solvent-thinned epoxies lose volume as the carrier evaporates, which thins the final film. A 100% solids formula holds its volume through the cure, so what you roll on is close to what you keep, giving you a thicker, tougher build, per technical guidance from GC Flooring Systems. That difference shows up years later as the gap between a floor that still looks new and one that’s peeling at the tire tracks.
Common finish options include:
- Satin or matte color coats for a softer, less glare-prone look in living spaces
- Gloss finishes for garages, where sheen reads as “clean” and hides less dirt than you’d think
- Slip-resistant textures created by broadcasting fine aggregate into the color coat before topcoating
- Tinted topcoats that deepen or slightly shift the base color for a richer finish
Solid color epoxy floor coating works equally well in a garage, a basement rec room, or a small commercial space, which is part of why it stays the most requested option among solid color flooring options for residential projects.
Is Solid Color Epoxy Worth It for Your Garage?
The performance case for epoxy floor coating is strong. A properly installed system resists motor oil, brake fluid, de-icing salt, and the everyday scuffing of bikes, tools, and foot traffic. Cleanup is usually a broom and a damp mop, no sealing or waxing required. Because the color coat is poured and rolled as one continuous surface, there are no grout lines or seams collecting grime, which is the seamless look most homeowners are actually chasing when they search for solid color epoxy floors in the first place.
The downsides are real, and skipping past them is how DIY projects fail:
- UV yellowing. Standard epoxy resins amber with sunlight exposure over time, especially near garage doors or windows. A polyaspartic or urethane topcoat slows this significantly.
- Slipperiness when wet. A glossy solid color floor gets slick fast if water, coolant, or snowmelt tracks in. A broadcast slip additive fixes this at install time; retrofitting is harder.
- Hot-tire pickup. Warm tires resting on a cured but still-softening epoxy film can peel or lift small patches, particularly on floors installed too fast or under specced.
- Adhesion failure. This is the big one. Nearly every epoxy failure story traces back to inadequate surface prep, not a bad product.
If your garage floor is already showing slip complaints, a DCOF benchmark of 0.42 wet is the industry reference point worth knowing before you pick a finish.
Pro Tip: If you park a hot vehicle straight off the highway in your garage most days, budget for a slip-resistant additive and a polyaspartic topcoat up front. It costs more at install and a lot less than a redo.
Epoxy also isn’t always the right resin chemistry. Environments with constant thermal cycling, heavy chemical exposure, or extreme impact loads sometimes call for polyaspartic or polyurethane systems instead, since epoxy alone isn’t formulated to handle every demand equally well.
What Product Specs Actually Matter for a DIY Install?
Manufacturer spec sheets bury the details that actually decide whether your project goes smoothly. Here’s what to check before you buy a kit.
-
Confirm it’s 100% solids, not water-based or solvent-thinned. Water-based epoxies are easier to clean up and cheaper, but they lay down a thinner, softer film. For a garage floor that has to survive tires and tool drops, 100% solids is the baseline, not an upgrade.
-
Read the coverage rate against your target mil thickness. A gallon that covers 133 to 150 square feet is calibrated for a 10 to 12 mil build, the range cited by One Stop Epoxy’s solid color system for garage and light commercial use. Spreading a gallon over more square footage than that thins the coat and shortens its life.
-
Check the pot life. Fast-set epoxies can gel in 15 minutes, which is brutal for a first-time DIYer working alone. Products offering a working time of around 30 to 40 minutes, like the formula detailed by Exterior Coatings, give you sufficient time to roll, broadcast additive, and cut in edges without rushing.
-
Decide on a topcoat. Bare epoxy color coats yellow under UV and scratch more easily than a topcoated system. A polyaspartic topcoat adds UV stability and often lets you walk on the floor within hours rather than days.
-
Test for moisture before you buy anything. A calcium chloride or relative humidity probe test tells you whether you need a moisture vapor barrier under the primer. Skip this on a slab-on-grade garage and you’re gambling with delamination.
-
Order slightly over your calculated need, not double. Mixed epoxy that doesn’t go down gets wasted fast, and pot life makes it risky to “save some for later.” Buy enough for full coverage plus a 10% buffer for waste, not a second full kit.
Pro Tip: If two brands both claim “100% solids” but one lists a 30-40 minute pot life and the other lists 12 minutes, the longer working time is the one a first-time installer should choose, even if it costs a little more per gallon.
Slip additives and tinted topcoats are the other line items worth budgeting for at the buying stage, since retrofitting texture after the floor cures means another full topcoat pass.
How Much Epoxy Do You Need, and What Will It Cost?
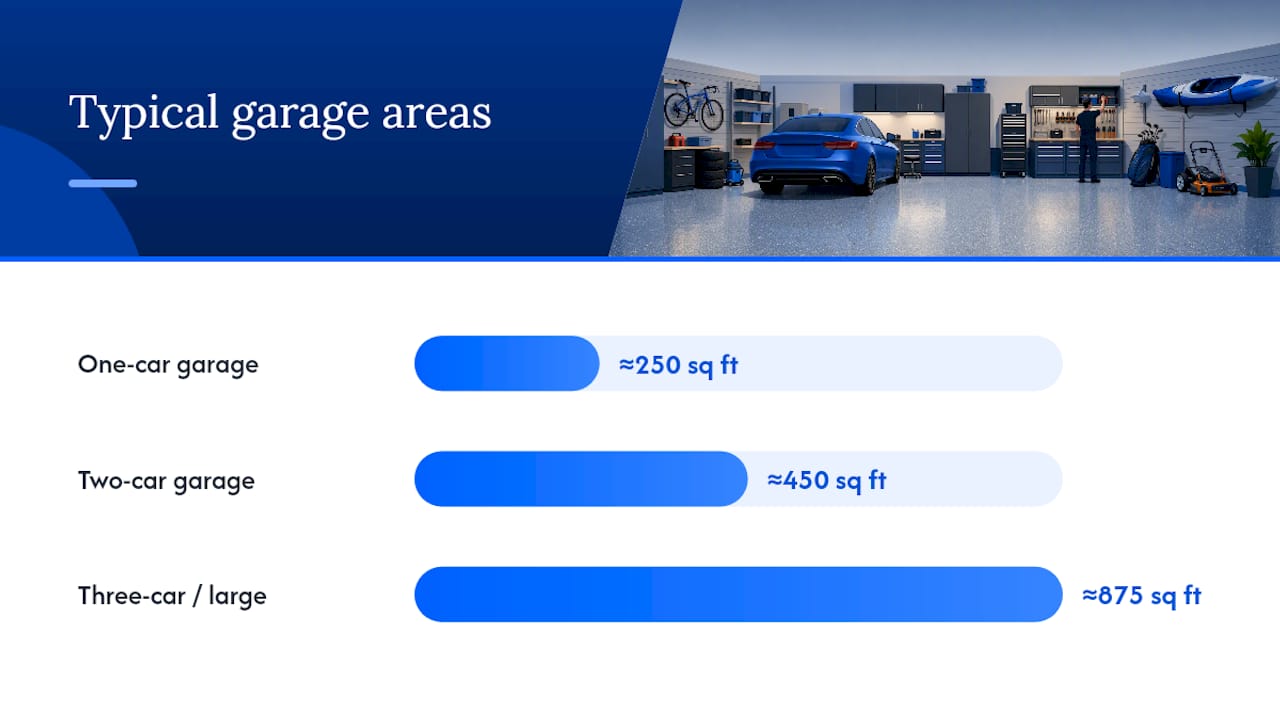
Coverage math is simple once you know the rate. At 133 to 150 square feet per gallon for the color coat, a standard one-car garage (around 250 square feet) needs roughly 2 gallons of color coat, while a typical two-car garage (400 to 500 square feet) needs closer to 3 to 4 gallons, before accounting for a primer coat and topcoat, which have their own coverage rates and usually run thinner.
Kits are sold to match these footprints directly. A 250 square foot kit is built for a standard one-car bay. Larger 780 to 970 square foot kits are aimed at two-car and three-car garages or small commercial bays, and buying one oversized kit is often cheaper per square foot than buying two smaller ones and hoping the batches match in color.
| Project scope | Typical area | DIY kit cost range | Professional install range |
|---|---|---|---|
| One-car garage | ~250 sq ft | Entry-level kit pricing | Higher due to labor and prep |
| Two-car garage | ~400-500 sq ft | Mid-size kit, 2 kits or 1 large kit | Full-day to multi-day pro job |
| Three-car / large garage | 780 to 970 sq ft | Large kit, closer to bulk pricing per sq ft | Multi-day pro job with equipment costs |
Professional installation almost always costs more per square foot than a DIY kit, but that premium buys mechanical grinding equipment, faster cure scheduling, and a warranty most DIY jobs don’t have. For a detailed breakdown of what drives pricing up or down, see typical garage epoxy cost factors.
Line items that catch first-time buyers off guard:
- Moisture vapor barrier upgrade if your slab tests damp, adding a separate product and labor step
- Topcoat, sold separately from most base color coat kits
- Slip-resistant additive, usually inexpensive but easy to forget until you’re standing in the aisle
- Rental or purchase of a grinder, since etching alone rarely holds up long-term
- Disposal fees for empty epoxy containers and leftover mixed material, which some municipalities treat as hazardous waste
The gap between the sticker price on a $150 kit and the real cost of a properly prepped floor is almost always the grinder rental and the topcoat, not the color coat itself.
Why Does Surface Prep Make or Break the Floor?
Every epoxy failure story you’ve read online, the peeling, the bubbling, the flaking, traces back to one root cause: the concrete wasn’t ready for the coating. Skip this section at your own risk.
-
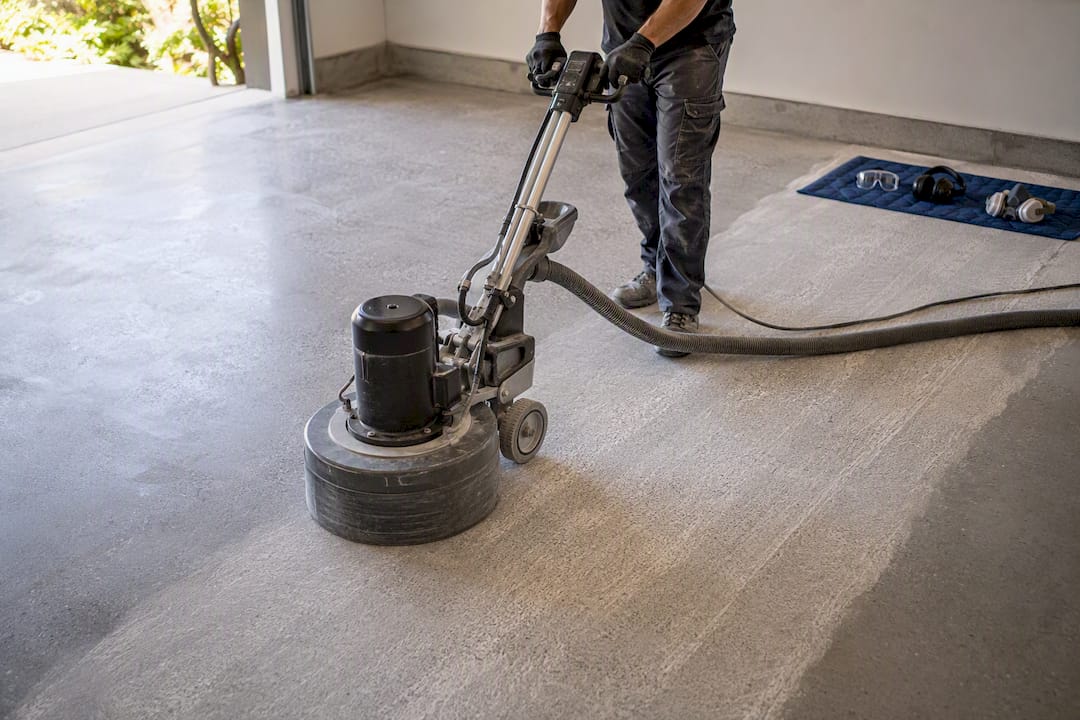
Grind, don’t just etch. Acid etching opens the surface chemically, but professional standards call for mechanical grinding or shotblasting to physically profile the concrete and open its pores, according to Sherwin-Williams’ resin flooring guidance. A rented walk-behind grinder handles most residential garages in a few hours and gives the epoxy something to mechanically grip rather than just sit on top of.
-
Repair cracks and joints first. Hairline cracks can be filled with a flexible epoxy crack filler; anything wider than a pencil lead or showing signs of movement needs a rigid epoxy paste and possibly a professional look before you coat over it.
-
Test for moisture. A relative humidity probe test or calcium chloride vapor emission test tells you what’s happening below the surface. Concrete slab profiling and RH testing are the most reliable predictors of long-term adhesion, and they determine whether you need a moisture vapor barrier under the primer.
-
Degrease and pressure wash. Years of dripped oil, transmission fluid, and tracked-in road grime sit in the pores of a garage slab. A degreaser followed by a thorough pressure wash pulls contaminants out before grinding locks them in. For homeowners who’d rather hand this step to a crew with commercial-grade equipment, this is exactly the kind of job professional pressure washing handles well.
-
Dry completely before coating. Concrete needs to be fully dry, not just surface-dry, before primer goes down. Rushing this step traps moisture under the coating and shows up months later as bubbling or delamination.
-
Gear up. Grinding concrete throws fine silica dust that requires a respirator rated for it, not a basic dust mask. Add safety glasses, chemical-resistant gloves for mixing epoxy, and good ventilation, since epoxy fumes during application and cure can be strong in an enclosed garage.
Pro Tip: If your garage floor has a visible white, powdery residue or a shiny “glazed” look in patches, that’s often a sign of moisture or old sealer. Both are prep problems a simple etch won’t fix, and both are reasons to test moisture before you buy a single can of epoxy.
For a deeper technical walkthrough of profiling standards, the surface preparation guide from Southern Sandblasting and Painting is a solid reference for homeowners who want the professional-grade version of these steps.
What Does the Application Process Actually Look Like?
Once the slab is ground, cleaned, and dry, the actual coating goes down in a tight, time-sensitive sequence. Here’s the realistic workflow.
-
Mix in small batches. Combine Part A and Part B exactly to the ratio on the label, using a drill paddle for at least three minutes. Never eyeball the ratio; epoxy chemistry doesn’t forgive guesswork.
-
Pour immediately, don’t let it sit in the bucket. Mixed 100% solids epoxy generates heat as it cures, an exothermic reaction that speeds up the longer the mixed batch sits in a container. Letting a full batch sit while you finish another task shortens your working time and can ruin the batch before it ever touches the floor.
-
Pour and spread in sections. Pour a ribbon of mixed epoxy across a 4 to 6 foot section, then spread it with a squeegee to an even thickness before back-rolling with a phenolic-core roller to level it and pop any bubbles.
-
Work with a helper on anything larger than a one-car garage. One person mixing while another rolls keeps the pace steady and prevents any single batch from overheating while you’re distracted spreading the last one.
-
Broadcast slip additive while the coat is still wet. If you’re adding texture, this happens within minutes of rolling, not after the fact. Waiting too long means the additive won’t bond into the film.
-
Cut in edges and corners last, using a smaller brush or roller to catch the areas the big roller misses against walls and baseboards.
Pot-life management is the single biggest variable separating a smooth DIY epoxy install from a ruined one. Plan smaller batches, work fast once mixed, and never treat a bucket of epoxy like paint you can walk away from.
Typical mistakes worth avoiding: mixing a batch too large for the working time of your product, rolling over an area that’s already started to gel, and recoating too soon before the prior layer has properly cured. Manufacturer instructions on recoat windows exist for a reason, rushing them traps solvents or uncured resin between layers.
If your slab has active cracks, a documented moisture problem, or you’re covering more than a three-car garage in a single day, that’s the point where hiring a professional crew with grinding equipment and multiple installers on hand starts making more financial sense than a DIY weekend.
When Can You Drive on It, and How Do You Know It’s Cured?
Full cure for vehicle traffic typically takes several days to a full week, even though the floor may feel hard much sooner. Rolling a hot tire onto an undercured floor is the single most common cause of hot-tire pickup, those small peeled patches near where a car regularly parks.
A few checks worth doing before you resume normal use:
- Press a fingernail into an inconspicuous spot. If it dents easily, it’s not fully cured yet.
- Look for a slight give or tackiness underfoot. Fully cured epoxy feels hard and glassy, not soft or sticky.
- Wait the full manufacturer window before parking, even if the surface looks finished sooner. Polyaspartic topcoats often speed this timeline versus a bare epoxy finish.
- Expect some yellowing over years, not months, in floors without a UV-stable topcoat. A polyaspartic or urethane topcoat slows this noticeably compared to an uncoated epoxy surface.
- Handle small chips or scuffs with a touch-up kit matched to your original color, rather than waiting until they spread.
Most manufacturers publish exact recoat windows on the product label, and following that schedule matters more than any general rule of thumb.
How Long Does a Solid Color Epoxy Floor Actually Last?
A well-prepped solid color epoxy floor commonly lasts anywhere from 10 to 20 years in a residential garage, with heavier commercial traffic shortening that range and light residential use extending it. The variables that move that number the most are surface prep quality, UV exposure, and whether the floor got a protective topcoat.
Routine care is simple:
- Sweep or dust mop regularly to keep grit from scratching the surface underfoot and under tires.
- Damp mop with a pH-neutral cleaner, avoiding ammonia-based products and abrasive scouring pads that dull the finish over time.
- Spot-clean oil, coolant, or chemical spills promptly rather than letting them sit, even though cured epoxy resists most of these far better than bare concrete.
- Keep a small touch-up kit on hand matched to your color and topcoat for chips near tool drops or heavy equipment.
- Watch for early wear patterns near the garage door threshold and tire tracks, which are usually the first spots to show dulling.
- Recoat with a fresh topcoat every several years in high-traffic areas if you notice increased scuffing or dulled gloss, rather than waiting for the base color coat itself to fail.
Following a maintenance routine that matches the original manufacturer’s care guidelines extends that lifespan meaningfully, especially the advice on dilution ratios for cleaners and knowing when a problem is beyond a DIY fix.
Should You DIY This or Call a Pro?
Every solid color epoxy job comes down to the same short checklist before you decide who’s doing the work: slab condition, moisture status, your timeline, how particular you are about the final finish, and your tolerance for working against a 30 to 40 minute clock with mixed epoxy in your hands.
If the slab is sound, dry, and you’re patient enough to grind it properly, a one-car or two-car garage is a genuinely manageable weekend project. If you’re seeing cracks wider than a pencil lead, any hint of moisture, or you want a flawless commercial-grade finish on a tight timeline, that’s when a professional crew earns its cost.
Some professional services handle the piece most DIYers underestimate: getting the slab actually ready. That means pressure washing to strip years of oil and grime, moisture testing to catch problems before they become bubbling epoxy, and professional epoxy coating installation for solid color, flake, or metallic finishes. When you request a quote, ask specifically for a moisture test result, confirmation of mechanical grinding versus etching, and the exact system spec, including topcoat type. A vague quote that skips those three items usually means a vague result on your floor.
— Brandon
Get Your Garage Floor Prepped and Coated Right
Professional services using commercial-grade pressure washing and grinding equipment handle the prep that most DIY jobs get wrong, then install the epoxy system itself. This avoids renting a grinder you’ll use once and reduces the risk of skipping a moisture test.

Services relevant to a solid color epoxy project include mechanical surface grinding, degreasing and pressure washing, moisture testing, and full epoxy coating installation in solid color, flake, or metallic finishes. When requesting a quote, ask for the full scope in writing: surface prep method, whether a moisture vapor barrier is needed, and topcoat options for UV resistance. Some companies offer service in Colorado Springs and the Denver metro area with same-week quotes and satisfaction guarantees backed by insurance. Check the service overview for what’s included, or request a quote directly to get a scoped estimate for your garage floor.
Where This Article’s Technical Claims Come From
The chemistry, coverage rates, and prep standards in this guide draw from manufacturer and industry technical resources rather than general blog consensus.
- Sherwin-Williams’ resin flooring guide for film-build categories and mechanical profiling standards
- GC Flooring Systems’ 100% solids epoxy bulletin for exotherm and mixing behavior
- Exterior Coatings’ product specifications for pot-life benchmarks
- One Stop Epoxy’s system breakdown for coverage rates and topcoat guidance