

Denver Homeowners: Don’t Pressure Wash New Concrete Under 28 Days
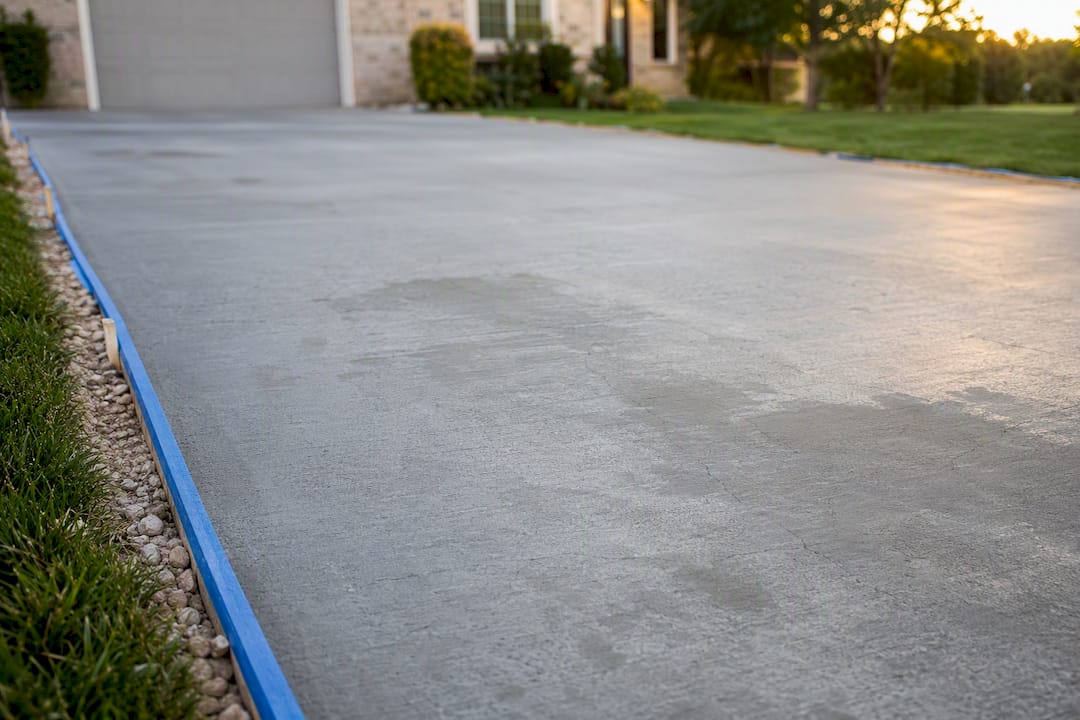
Yes, pressure washing can permanently damage concrete when the pressure, nozzle, or distance is wrong for the surface. The usual culprits are excessive PSI, a narrow-degree nozzle held too close, and water forced into cracks on new or already-weak slabs. If you’ve already sprayed and something looks off, stop, inspect the surface in good light, and use the technique guidance below before you touch the wand again.
TL;DR:
- Pressure washing above 1,500 PSI with a narrow nozzle held close can carve into concrete or push water into cracks, leading to damage.
- Surface damage signs include etching, pitting, spalling, tiger striping, or increased porosity that accelerates water absorption and staining.
- Using a 0° or 15° nozzle on concrete increases risk; instead, choose lower-pressure settings and wider nozzles or surface cleaners.
- Pre-treat stains with appropriate detergents and avoid pressing in one spot to prevent creating hot spots that lift the concrete’s delicate top layer.
- Professional cleaning with calibrated equipment and proper technique prevents damage, especially on fragile, new, stamped, or damaged concrete surfaces.
Table of Contents
- Signs Your Pressure Washing Damaged the Concrete
- Why Does Pressure Washing Damage Concrete?
- How to Pressure Wash Concrete Without Damaging It
- How Do You Protect Concrete Before and After Washing?
- When Should You Hire a Professional Instead of DIY?
- Get Your Concrete Cleaned the Right Way
- Sources
Signs Your Pressure Washing Damaged the Concrete
Some damage shows up the moment the water hits the slab. Etching looks like light, blotchy discoloration where the top layer got stripped away. Pitting leaves small pockmarks, usually from holding the nozzle too close or too long in one spot. Spalling is worse: chunks of the surface flake or pop off, exposing the aggregate underneath. You might also see “tiger striping,” those parallel light and dark bands left by uneven wand movement, or a rougher, more porous texture that soaks up water and stains faster than before.
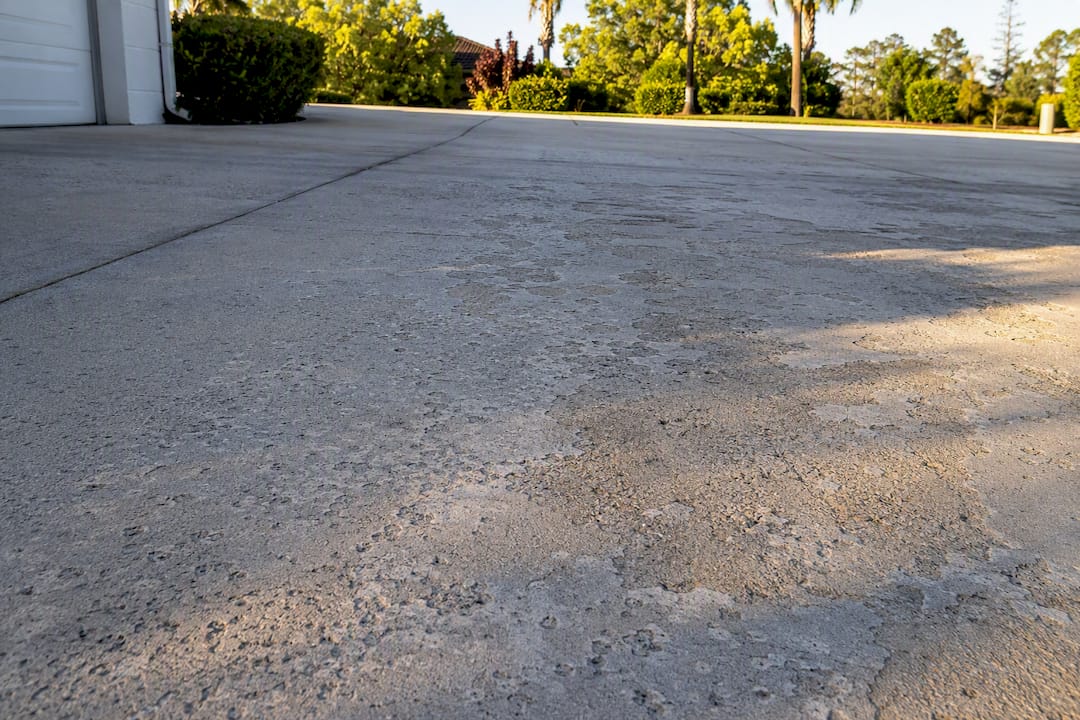
Not all damage announces itself right away. Water pushed into hairline cracks or expansion joints can settle quietly for months before you notice a dip, a void, or a section that shifts underfoot, especially after a freeze-thaw cycle. Contractor reports on concrete damage confirm etching and spalling are the most common outcomes of improper technique, not rare exceptions.
Before you decide whether to keep cleaning or call it quits for the day, walk the surface and check for:
- Chalky, lightened patches where the finish looks “sanded down”
- Small craters or divots clustered in one area
- Visible stone or gravel poking through the surface
- New cracks or widened joints near where you sprayed
- Streaking that follows your spray pattern instead of the stain
Photograph anything questionable from a few angles. That record matters if you end up calling a repair specialist or filing an insurance claim later.
Why Does Pressure Washing Damage Concrete?
Concrete’s surface is deceptive. Underneath, it’s tough enough to hold up a garage floor, but the very top layer, called the cream coat or paste, is a thin, softer film formed during finishing. That layer is what a pressure washer actually fights, and it’s far more fragile than the slab beneath it. Concrete curing research from the American Concrete Institute explains why that top layer stays vulnerable for weeks after a pour and why aggressive cleaning strips it faster than normal weathering ever would.
The damage comes down to three variables working together: pressure, nozzle angle, and distance. A 0-degree nozzle concentrates the entire stream into a pinpoint, and combined with high PSI held six inches from the slab, it can carve into concrete almost like a blade. Consumer Reports notes that machines above roughly 1,500 PSI can clean concrete effectively, but the risk climbs sharply as pressure increases without a matching adjustment in nozzle or distance.
There’s a second, less obvious risk: water intrusion. Forcing a jet directly into a crack or expansion joint pushes water beneath the surface, where it can erode the base material and create voids you won’t see until the slab settles. Regional concrete repair specialists document this pattern often, particularly in climates with hard freeze-thaw cycles.
- New concrete (under 28 days old) hasn’t fully cured and is especially soft
- Stamped or decorative concrete has a thinner, more delicate finish coat
- Salt-damaged or already-scaling concrete has less structural paste left to protect
How to Pressure Wash Concrete Without Damaging It
Getting this right isn’t complicated, but it does mean matching your equipment settings to the surface instead of blasting everything at full power.
1. Match PSI and nozzle to the concrete type.
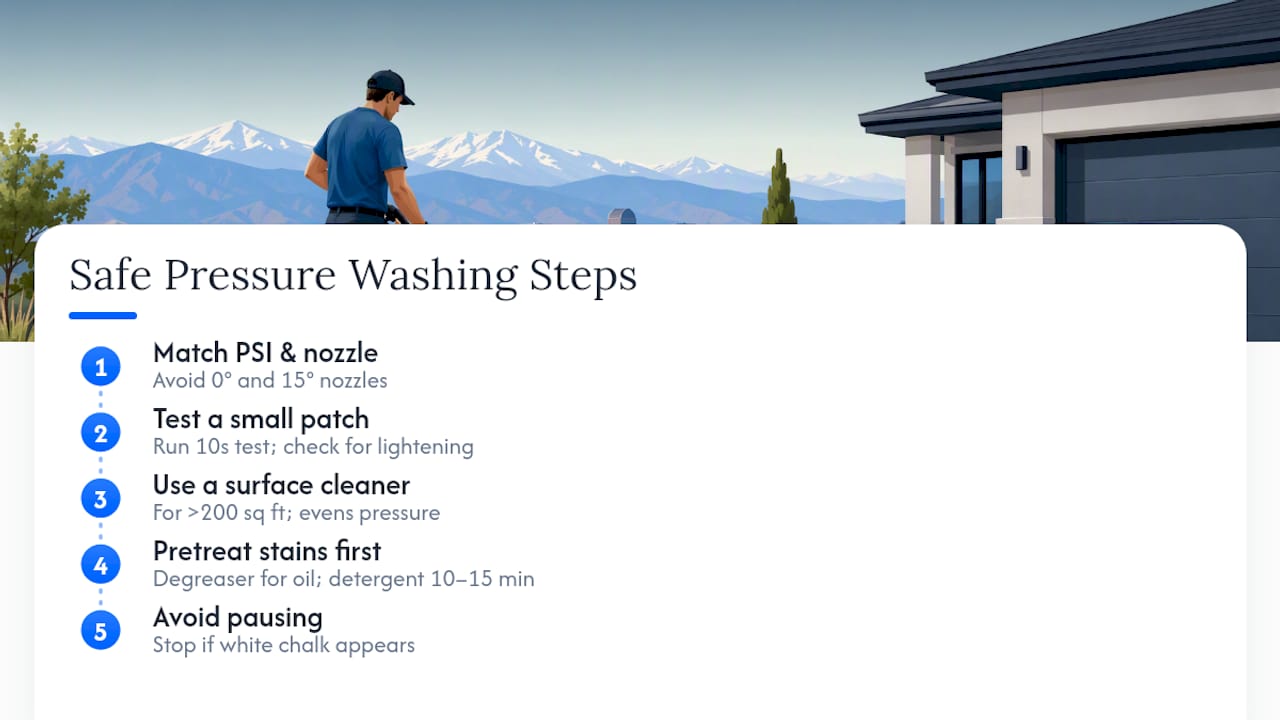
Practical technique guides recommend avoiding 0° and 15° nozzles on nearly all concrete surfaces. Those tight nozzles are built for stripping paint, not cleaning a driveway.
2. Test a small patch first. Pick a corner near an edge or planting bed and run your planned settings for ten seconds. If you see any lightening or roughness, back off the PSI or widen the nozzle before covering the whole slab.
3. Use a surface cleaner on anything over 200 square feet. A rotating surface-cleaner attachment spreads pressure evenly across a wide path instead of concentrating it in one line, which is why it dramatically cuts etching risk on driveways and patios compared to a handheld wand.
4. Pre-treat stains instead of blasting them out. Oil and grease respond best to a degreaser with a short dwell time before you ever turn on the machine. Mildew and organic staining need a detergent solution left to sit for 10 to 15 minutes. Applying detergent first lets you clean effectively at a lower PSI, which is the single easiest way to protect the surface while still getting a stain out. Our guide on removing grease from concrete walks through the degreaser step in more detail.
5. Any pause creates a hot spot.
Pro Tip: If you see white streaking or a chalky patch appear mid-wash, stop immediately. That’s the cream coat lifting, and continuing in the same spot only widens the damaged area.
For siding, trim, or delicate surfaces near your concrete, our low-pressure house washing guide covers nozzle choices that won’t undercut your foundation work.
How Do You Protect Concrete Before and After Washing?
Prevention starts before you ever pick up the wand. Seal visible cracks and expansion joints two to three weeks ahead of time, giving the sealant time to cure. That single step is one of the most cost-effective ways to block water intrusion during cleaning, according to regional repair specialists who see the settlement problems that show up when it’s skipped. Our crack-sealing repair guide covers the materials and timing in more detail.
After washing, let the slab dry fully before resealing, typically 24 to 48 hours depending on humidity and temperature. If the surface still feels damp or cool to the touch after two full days, there may be trapped moisture underneath, which is worth investigating before sealing over it.
For resealing:
- Penetrating silane or siloxane sealers work into the pores and are the better choice for driveways exposed to freeze-thaw cycles
- Film-forming acrylic sealers sit on top and give more sheen but need reapplication every 1 to 3 years
- Reseal roughly every 2 to 3 years, or sooner if you notice water no longer beading on the surface
If you’re already seeing pitting, spalling, or exposed aggregate, small areas can sometimes be patched with a concrete resurfacer. Anything beyond a few square feet, or any sign of settlement, calls for a professional assessment before you spend money on a patch that won’t hold.
When Should You Hire a Professional Instead of DIY?
Some jobs are worth handing off, and knowing which ones saves you from turning a cleaning project into a repair bill. Call a pro if you’re dealing with concrete less than 28 days old, a large surface area, visible cracking or settlement, heavy embedded stains that won’t lift with pretreatment, or any sign that water has already gotten under the slab.
When you’re vetting a contractor, ask directly about their equipment and process. A reputable crew should be insured, use calibrated equipment with documented PSI settings for different surfaces, and default to a surface-cleaner attachment rather than a bare wand for open concrete. Ask for before-and-after photos of comparable jobs and whether they offer any guarantee on the work. Companies that specialize in driveway and concrete cleaning typically walk you through their PSI and detergent approach before they start, which is a fair thing to expect from anyone you hire.
The difference between a DIY pass and a professional one usually comes down to consistency. A trained crew keeps the same distance and overlap across an entire driveway, where a homeowner’s hand naturally drifts, and that drift is exactly what produces the striping and hot spots discussed earlier. If you manage a larger commercial lot, our guide to hiring for parking lot pressure washing covers what to look for at scale.
— Brandon
Get Your Concrete Cleaned the Right Way
If you’d rather skip the trial-and-error of matching PSI to nozzle degree, Alldaypowerwashing runs calibrated, commercial-grade equipment on every job, so your driveway gets cleaned without the etching or striping that comes from guesswork. That’s the real advantage over renting a consumer unit and hoping for the best: our crews already know which settings a stamped patio needs versus a standard poured slab, and they adjust on site instead of learning the hard way on your concrete.

Alldaypowerwashing serves homeowners and property managers across Colorado Springs and the Denver metro, handling everything from driveway cleaning to full commercial lot washing with fully insured crews and a satisfaction guarantee. If your concrete already shows etching or staining you’re not sure how to handle, or you just want it done right the first time, you can check our service coverage in Denver or request a same-week quote and get a straight answer on what your surface needs.
Sources
- Consumer Reports — surfaces safe to clean with a pressure washer
- How to Pressure Wash a Driveway Without Damaging Concrete — Linea
- Concrete
- Pressure Washing Damage to Concrete Colorado Springs: Guide