
How to Remove Paint From a Concrete Driveway
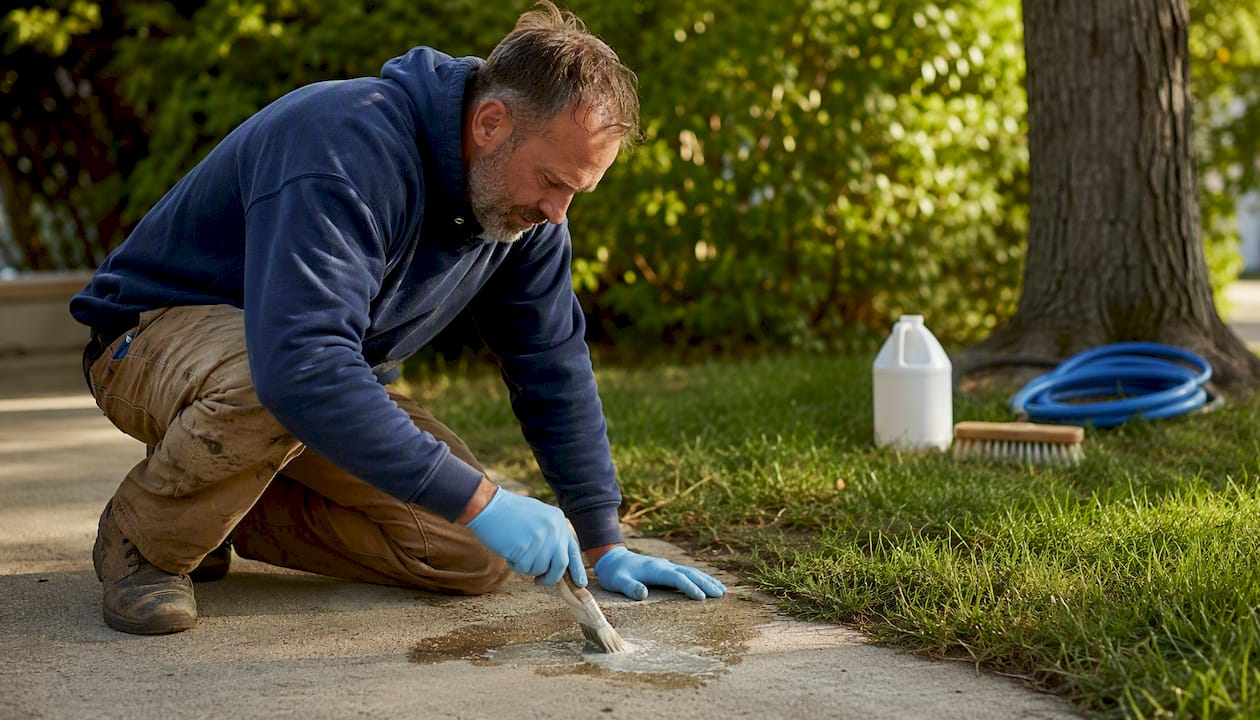
Match the remover to the paint type and you’ll solve most driveway paint problems without damaging the concrete. Fresh latex? Warm soapy water and a stiff brush often do it. Dried latex or oil-based paint? A gel stripper plus a moderate-pressure hot-water rinse is your best path. Epoxy or a thick multi-layer coating? Plan for chemical stripping followed by mechanical grinding, or call a pro. The single biggest mistake homeowners make is reaching for a pressure washer first and cranking the PSI up. That approach frequently scars the surface and still leaves pigment in the pores.
Before you start anything:
- Test a small, hidden patch first to confirm the method won’t etch or discolor the concrete
- Block nearby drains with a drain plug or absorbent boom to contain runoff
- Gather basic PPE: chemical-resistant gloves, safety glasses, and a respirator if you’re using solvent-based products
Quick decision guide:
- Soap and scrubbing: fresh latex spills, small spots, paint less than 24 hours old
- Gel chemical stripper: dried latex, oil-based paint, or any coating that resists water
- Hire a pro: epoxy coatings, multiple paint layers, staining that has soaked deep into the pores, or any job where you’ve already tried twice and the ghost remains
Pro Tip: Dawn dish soap is genuinely useful on fresh latex, but don’t expect it to touch cured oil-based or epoxy coatings. Household remedies like vinegar and baking soda rarely remove those harder coatings once they’ve fully cured.
Table of Contents
- How to identify the paint type before you start
- Which removal method fits your situation?
- Step-by-step DIY guides for each paint type
- What tools and products do you actually need?
- Safety, containment, and responsible disposal
- When should you stop DIYing and call a pro?
- Key Takeaways
- The part most guides skip: what actually goes wrong
- Alldaypowerwashing handles the jobs that fight back
- Useful sources and further reading
How to identify the paint type before you start
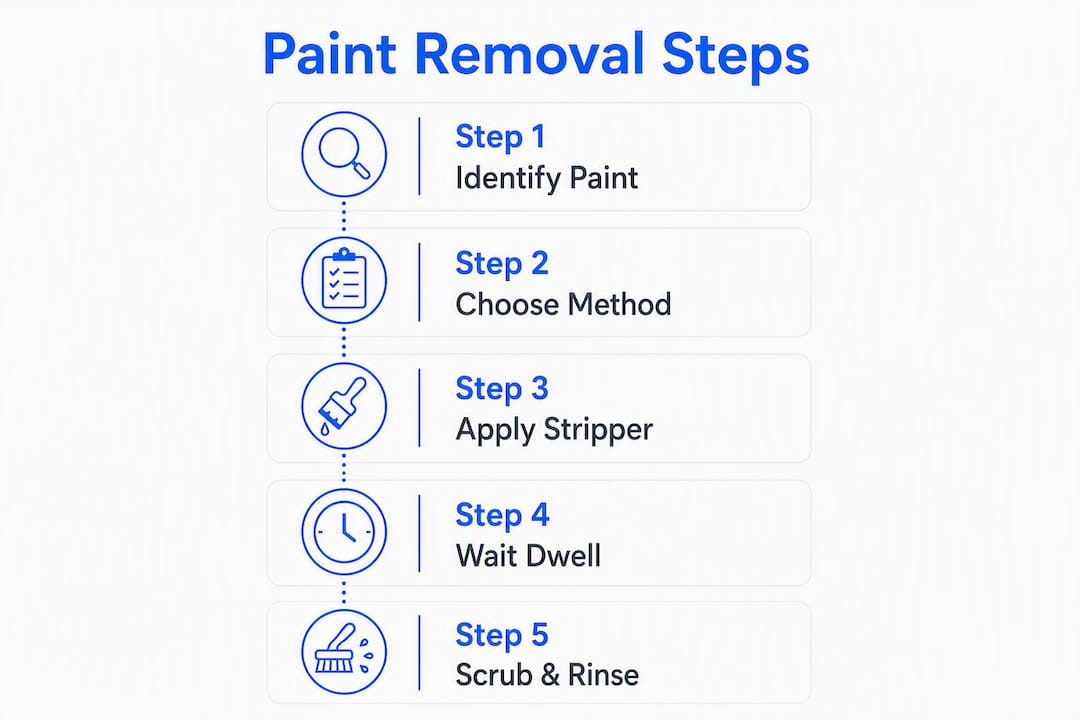
Getting the removal method right depends entirely on knowing what you’re dealing with. Spend five minutes here and you’ll save hours of failed attempts.
Visual and tactile clues:
- Latex/acrylic: Tends to peel or flake at the edges, looks slightly chalky when old, and often shows a flat or low-sheen finish. Overspray from a nearby painting project is almost always latex.
- Oil-based: Harder, glossier surface. Resists scratching with a fingernail. Often yellows with age.
- Epoxy: Extremely hard, sometimes with a slight texture or color flake. Common in garage floors that were previously coated. Doesn’t flex or peel easily.
The rubbing alcohol test: Soak a rag in isopropyl alcohol and rub it firmly on the paint for 30 seconds. If color transfers to the rag, the coating is water-based (latex or acrylic). If nothing transfers, you’re dealing with an oil-based or epoxy coating that needs a solvent-based or specialty stripper.
Setting up a test patch:
Practical DIY guides consistently stress testing an inconspicuous area before committing to a full treatment. Pick a corner or edge, apply your chosen method at full strength, and wait the full recommended dwell time. A “successful lift” means the paint softens, bubbles, or scrapes away cleanly without the concrete surface turning white, pitting, or showing aggregate.
Concrete is porous by nature. When paint soaks into those pores rather than sitting on the surface, standard surface methods often fail to fully remove it. If your test patch leaves a faint ghost stain after a thorough rinse, the pigment has penetrated the concrete matrix, and you’ll need either a chelating neutralizer wash or professional extraction to pull it out.
| Paint type | Rubbing alcohol test | Visual clue | Recommended method |
|---|---|---|---|
| Fresh latex | Color transfers easily | Flat, slightly tacky | Soap, warm water, scrub brush |
| Dried latex | Some color transfer | Peeling edges, chalky | Gel stripper + pressure rinse |
| Oil-based | No transfer | Glossy, hard, yellowed | Solvent-safe stripper + neutralize |
| Epoxy | No transfer | Very hard, may have flakes | Chemical stripper + mechanical grinding |
Which removal method fits your situation?
Matching job size to method is as important as matching chemistry to paint type. A method that works perfectly on a two-square-foot spill can be completely impractical on a 400-square-foot driveway.
| Method | Best for | Key risk | Cost range |
|---|---|---|---|
| Soap + scrubbing | Fresh latex, small spots | Ineffective on cured paint | Minimal |
| Gel chemical stripper | Dried latex, oil-based | Skin/eye hazard; slurry disposal | — |
| Pressure washing alone | Loose, peeling coatings | Concrete etching at high PSI | — |
| Pressure wash + stripper | Most exterior latex/oil jobs | Runoff containment required | — |
| Angle grinder / floor grinder | Epoxy, thick coatings | Silica dust; surface scarring | — |
| Dustless/media blasting | Epoxy, large areas, old coatings | Requires professional equipment | $3–$7/sq ft professional |
Chemical gel strippers work by softening the coating at the surface and penetrating into near-surface pores. Dwell time is everything. Most DIY failures happen because the stripper dries out before it finishes working, or gets rinsed off too soon. Covering the applied stripper with plastic sheeting keeps it wet and dramatically improves lift.
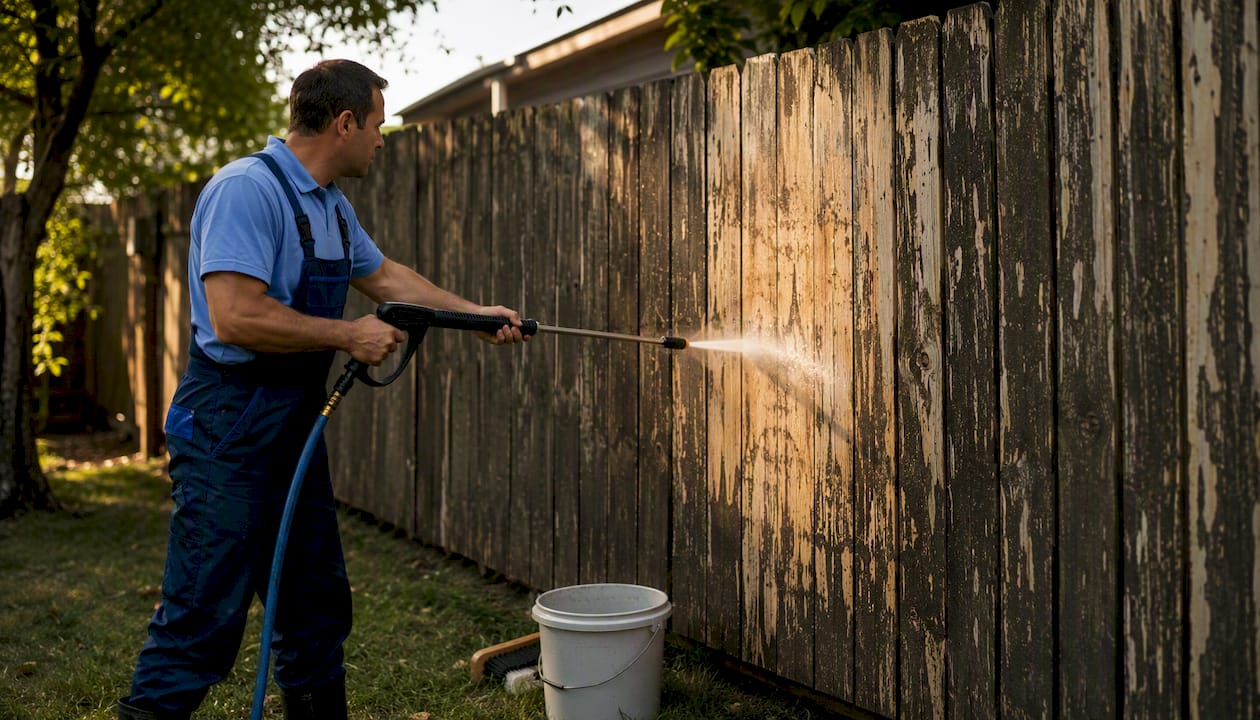
Pressure washing alone is often oversold as a solution. Cold water at maximum PSI frequently fails on anything but loose, peeling paint, and excessive pressure damages concrete by exposing aggregate and etching the surface. Hot water at moderate pressure, combined with the right chemistry, outperforms cold water at max PSI every time.
Mechanical grinding removes what chemistry can’t, but it generates silica-containing dust. That requires a respirator rated N95 or better, and ideally a grinder with a HEPA dust shroud attached.
Pro Tip: For most exterior driveway jobs, the most effective sequence is: apply gel stripper, cover with plastic, wait the full dwell time, scrape, then rinse with hot water at 2,000–3,000 PSI using a 25-degree nozzle. That combination handles the majority of latex and oil-based paint without scarring the concrete.
- Eco-conscious options: Citrus-based and biodegradable gel strippers work well for many outdoor residential jobs and carry lower environmental risk, though proper containment and sludge disposal remain essential regardless of the product’s green credentials
- Avoid acid-based strippers on concrete unless the label specifically states concrete compatibility; muriatic acid etches the surface and can cause permanent damage
Step-by-step DIY guides for each paint type
Fresh latex (spilled or splashed within 24 hours)
- Blot up as much wet paint as possible with a rag or paper towels. Don’t spread it.
- Mix a few drops of Dawn dish soap into a bucket of warm water.
- Scrub the stain with a stiff-bristle brush using circular motions for 2–3 minutes.
- Rinse with a garden hose. Repeat once if needed.
- For any residue, apply undiluted Dawn directly, let it sit for 5 minutes, scrub again, and rinse.
Dried latex or overspray
- Sweep the area clean and remove any loose debris.
- Apply a gel-based paint stripper in an even layer, roughly 1/8 inch thick, covering the entire stained area.
- Cover immediately with plastic sheeting and tape the edges down to prevent evaporation.
- Allow a dwell time of at least 4–6 hours; overnight is better for thick or layered coatings.
- Remove the plastic and scrape the softened paint with a plastic scraper or floor scraper. Collect the slurry in a bucket, not a drain.
- Rinse with hot water at 2,000–2,500 PSI using a 25-degree nozzle, keeping the wand moving.
- Check for ghosting. If faint color remains, apply a neutralizing rinse (dilute baking soda solution or a commercial pH neutralizer) and scrub lightly.
| Step | Key detail |
|---|---|
| Stripper thickness | At least 1/8 inch — thin coats dry out and fail |
| Dwell time | 4–6 hours minimum; cover with plastic |
| Scraping | Plastic scraper first to avoid concrete scratching |
| Rinse pressure | 2,000–2,500 PSI, 25-degree nozzle, hot water preferred |
| Neutralize | Baking soda solution or commercial neutralizer after rinse |
Oil-based paint
Fresh latex usually responds to soap and water, but oil-based coatings typically need gel or solvent-based strippers and more patience.
- Ventilate the area. Work outdoors or with strong cross-ventilation; solvent fumes concentrate fast in enclosed spaces.
- Apply a solvent-compatible gel stripper rated for oil-based coatings. Follow the label’s thickness recommendation.
- Cover with plastic and allow 6–8 hours of dwell time.
- Scrape and collect slurry. Dispose of it as chemical waste, not in household trash or down a drain.
- Neutralize the surface with a dilute TSP (trisodium phosphate) solution or a commercial concrete neutralizer, scrub, and rinse thoroughly.
- Allow the concrete to dry completely (24–48 hours) before assessing results.
Epoxy and very old multi-layer coatings
Chemical stripping alone rarely removes epoxy completely. Plan for a two-stage process.
- Apply a heavy-duty epoxy stripper or methylene-chloride-free stripper rated for epoxy. Cover with plastic and allow the maximum dwell time on the label, typically 8–12 hours.
- Scrape and collect all softened material.
- Rinse and let dry. Assess what remains.
- For residual film, use an angle grinder fitted with a diamond cup wheel, or rent a walk-behind floor grinder for larger areas. Attach a HEPA dust shroud.
- Wear an N95 or P100 respirator, safety glasses, and hearing protection. Silica dust from concrete grinding is a serious respiratory hazard.
- After grinding, vacuum all dust with a HEPA vacuum, then rinse the surface.
If the epoxy has penetrated deeply or covers a large area, this is the point where professional dustless blasting or diamond grinding with industrial dust control becomes the practical choice.
What tools and products do you actually need?
The right equipment makes a real difference. Here’s what to gather before you start.
| Tool / Product | Use case | Notes |
|---|---|---|
| Stiff-bristle scrub brush | Fresh latex, small spots | Nylon or natural bristle; avoid wire on bare concrete |
| Plastic floor scraper | Lifting softened paint slurry | Metal scrapers can gouge concrete |
| Gel paint stripper | Dried latex, oil-based, light epoxy | Match product to paint resin type |
| Citrus/bio-based stripper | Outdoor residential, eco-preference | Longer dwell time needed vs. solvent types |
| Pressure washer (2,000–4,000 PSI) | Rinsing after stripping; loose coatings | 2,000–4,000 PSI range is effective for most paint removal rinses |
| 25-degree nozzle | General rinse after stripping | Avoid 0-degree nozzle on concrete |
| Angle grinder + diamond cup wheel | Epoxy residue, small areas | Requires HEPA dust shroud |
| Walk-behind floor grinder | Large epoxy or thick coating areas | — |
| HEPA wet/dry vacuum | Slurry and dust collection | Required for grinding work |
| TSP or pH neutralizer | Post-strip surface prep | Neutralizes chemical residue before sealing |
On pressure-washer settings: Hot water is the real variable. Thermal expansion helps break the paint-to-concrete bond, so removal succeeds at safer pressures. Professionals focus on heated water and correct chemistry rather than maxing out PSI. A 25-degree nozzle at 2,500 PSI with hot water outperforms a 0-degree nozzle at 4,000 PSI cold, and it won’t scar the surface.
Chemical stripper types by paint resin:
- Gel-based water-cleanup strippers: Best for latex and acrylic; low fume, easier disposal
- Solvent-based gel strippers: Required for oil-based and alkyd coatings; stronger fumes, needs ventilation
- Epoxy-specific strippers: Formulated with stronger solvents or methylene-chloride-free chemistry; follow label exactly
- Bio-based/citrus strippers: Suitable for lighter latex jobs outdoors; longer dwell time, lower toxicity
For guidance on pairing the right detergent with pressure washing, the pressure washing chemistry guide covers safe product combinations in more detail.
Safety, containment, and responsible disposal
Paint slurry is chemical waste. Washing it into a storm drain is illegal in most U.S. jurisdictions and can result in fines under the Clean Water Act. The containment step is not optional.
Minimum PPE by task:
- Chemical stripping: Chemical-resistant gloves (nitrile or neoprene), safety glasses or goggles, long sleeves, closed-toe shoes. Add a half-face respirator with organic vapor cartridges for solvent-based products.
- Pressure washing: Safety glasses, closed-toe shoes, waterproof gloves.
- Grinding or sanding: N95 or P100 respirator (silica dust is a serious lung hazard), safety glasses, hearing protection, dust shroud on the grinder.
Containment before you start:
- Plug nearby storm drains with a rubber drain plug or absorbent drain boom
- Lay plastic sheeting or a tarp around the work area to catch drips and slurry
- Use a wet/dry vacuum or squeegee to collect slurry into a bucket as you work; never let it flow freely across the driveway toward a drain
Disposal:
- Collect all paint slurry, used stripper, and contaminated rinse water in sealed containers
- Contact your local household hazardous waste (HHW) facility for drop-off options; most U.S. counties run free HHW collection days
- Dried, fully cured paint chips from scraping may be bagged as solid waste in many jurisdictions, but check your local rules
- Never pour chemical stripper or paint slurry down a drain, into soil, or into a storm drain
Pro Tip: A simple absorbent boom around the perimeter of your work area costs a few dollars at a hardware store and prevents the most common containment failure: slurry running off the driveway edge into landscaping or a street drain.
Eco-friendly strippers reduce the toxicity of the slurry, but containment and disposal requirements still apply. Even biodegradable products can harm aquatic ecosystems if they reach waterways in concentrated form.
When should you stop DIYing and call a pro?
Most homeowners can handle fresh latex and single-layer dried latex without professional help. The situations below are where DIY typically fails, costs more in the long run, or risks permanent concrete damage.
Signs the job has outgrown DIY:
- You’ve applied a gel stripper twice and the paint keeps reappearing (ghosting from deep pore penetration)
- The coating is epoxy, traffic paint, or an industrial floor coating
- The stained area exceeds roughly 100 square feet
- You see concrete etching, pitting, or aggregate exposure from a previous high-pressure attempt
- The job requires grinding, and you don’t have access to a HEPA dust-control system
Cost and time comparison:
| Scenario | DIY estimate | Professional estimate |
|---|---|---|
| Small latex spill | — | Not typically needed |
| Epoxy or large area | — | $3–$7/sq ft for specialty methods |
What professionals bring that you can’t easily replicate:
- Commercial hot-water pressure washers that reach temperatures DIY units can’t
- Dustless blasting systems that contain media and debris simultaneously
- HEPA-rated industrial vacuums and slurry containment systems
- pH testing and neutralization protocols that protect the concrete before sealing
- Waste hauling: the slurry leaves with them
Pro Tip: If you’re planning to seal or resurface the driveway after paint removal, professional prep is worth the cost. Sealer applied over a surface with residual paint pigment, chemical contamination, or micro-etching from overpressure will fail within a season. A clean, neutralized, properly profiled surface is the only foundation that holds.
For context on removing rust stains from concrete driveways, the same principle applies: surface prep quality determines how long any subsequent treatment lasts.
Key Takeaways
The most effective way to remove paint from a concrete driveway is to match the removal method to the paint type, contain the slurry from the start, and never substitute brute-force pressure for the right chemistry.
| Point | Details |
|---|---|
| Identify before you act | Use the rubbing alcohol test to confirm paint type before choosing a stripper or method. |
| Dwell time determines success | Cover gel stripper with plastic and wait 4–6 hours minimum; rinsing too soon is the most common DIY failure. |
| Pressure settings matter | Use 2,000–2,500 PSI with a 25-degree nozzle and hot water; high cold-water PSI scars concrete without removing paint. |
| Contain and dispose properly | Collect all slurry in sealed containers and drop off at a local HHW facility; never wash it into a drain. |
| Alldaypowerwashing for tough jobs | For epoxy, large areas, or deep pore staining in Colorado Springs or Denver, Alldaypowerwashing brings commercial hot-water gear, dustless blasting, and full slurry containment. |
The part most guides skip: what actually goes wrong
Most articles on concrete paint removal make the process sound linear. Apply stripper, wait, rinse, done. The reality on a driveway that’s been sitting in Colorado sun and freeze-thaw cycles for years is messier than that.
The most common failure isn’t choosing the wrong product. It’s impatience. Homeowners apply a stripper, check it after an hour, see it hasn’t fully lifted, and then reach for the pressure washer at full blast. That sequence is how you end up with a driveway that has both a ghost stain and fresh surface damage. The paint pigment stays in the pores; the concrete surface gets etched. Now you’ve made the job harder and more expensive.
The second most common mistake is underestimating containment. Paint slurry on a sloped driveway moves fast. By the time you notice it heading toward the street drain, it’s already there. A five-minute setup with a drain plug and a perimeter tarp prevents a problem that can’t be undone.
There’s also a category of jobs that genuinely shouldn’t be DIY, and it’s not a failure to recognize that. Epoxy coatings, traffic markings, and paint that has soaked into porous concrete over years require equipment and waste-handling infrastructure that most homeowners don’t have and can’t easily rent. Trying to grind epoxy off a 300-square-foot driveway with a rented angle grinder and no dust control is a health risk, not just an inconvenience.
The right call is knowing which category your job falls into before you spend a weekend on it.
Alldaypowerwashing handles the jobs that fight back
Paint removal on a concrete driveway is straightforward when it’s fresh latex on a small area. When it’s epoxy, old oil-based paint, or a stain that’s been baking into a Colorado driveway through multiple freeze-thaw seasons, the job calls for commercial-grade equipment and proper waste containment, not a rented pressure washer and a bottle of stripper.

Alldaypowerwashing brings commercial hot-water pressure washing units, dustless blasting options, HEPA-controlled grinding, and full slurry containment and disposal to driveway paint removal jobs across Colorado Springs and the Denver metro area. No ghost stains left behind, no chemical waste washed into your yard, and no concrete damage from overpressure. The crew arrives with everything needed to handle the job from start to finish, including pH neutralization and surface prep if you’re planning to seal afterward.
Request a same-week quote for your driveway. Have the approximate square footage, the paint type if you know it, and a photo ready. For Denver-area properties, the Denver pressure washing service page has local availability and service details.
Useful sources and further reading
The resources below back the methods and safety guidance in this article. Always read product labels for specific dwell times and safety requirements, and check your county’s household hazardous waste program for local disposal options before you start.
| Resource | What it covers |
|---|---|
| How to Remove Paint from Concrete: Fast, Safe Methods | Method selection by paint type, cost estimates for specialty removal |
| Pro guide: removing paint from concrete without damaging the surface | Pressure-washer settings, hot water vs. PSI, professional technique |
| How to Remove Paint From Concrete: Full Guide | Job-size matching, rental vs. professional decision framework |
| How to Remove Paint from Concrete Driveways: Safe DIY Methods | Test patch setup, drain protection, containment steps |
| How to remove paint from concrete without damaging the surface | Chemical stripper application depth, dwell time science |
| How to Get Spray Paint Off Concrete and Cement | Spray paint and overspray removal on driveways and patios |
| How to Strip Paint (STIHL) | Pressure-washer PSI guidance for paint removal |
| 3 Ways to Remove Paint from Concrete (wikiHow) | General DIY overview, scraper and stripper use |
| Sealing Concrete Driveway Cracks: Repair Guide | Post-removal concrete care and sealing recommendations |
| Low Pressure House Washing: A Safe Guide for Homeowners | Safe pressure settings and substrate protection techniques |
Before using any chemical stripper: read the full product label, confirm the product is rated for your paint type, and verify local disposal rules at your county’s household hazardous waste program. Rules vary by state and municipality.
Recommended
- How to Remove Rust Stains from Your Concrete Driveway — All Day Power Washing
- How to Remove Oil Stains From Your Asphalt Driveway — All Day Power Washing
- Sealing Concrete Driveway Cracks: 2026 Repair Guide — All Day Power Washing
- Top 3 Graffiti Removal Service Near Me Providers 2026 — All Day Power Washing